In first part of the article we covered all the prerequisites for Pydio 8 installation on Windows Server 2016. You can find this article on this link – https://www.informaticar.net/how-to-install-pydio-8-on-windows-server-2016-part-1/
We are continuing here with the installation of the Pydio.
Pydio
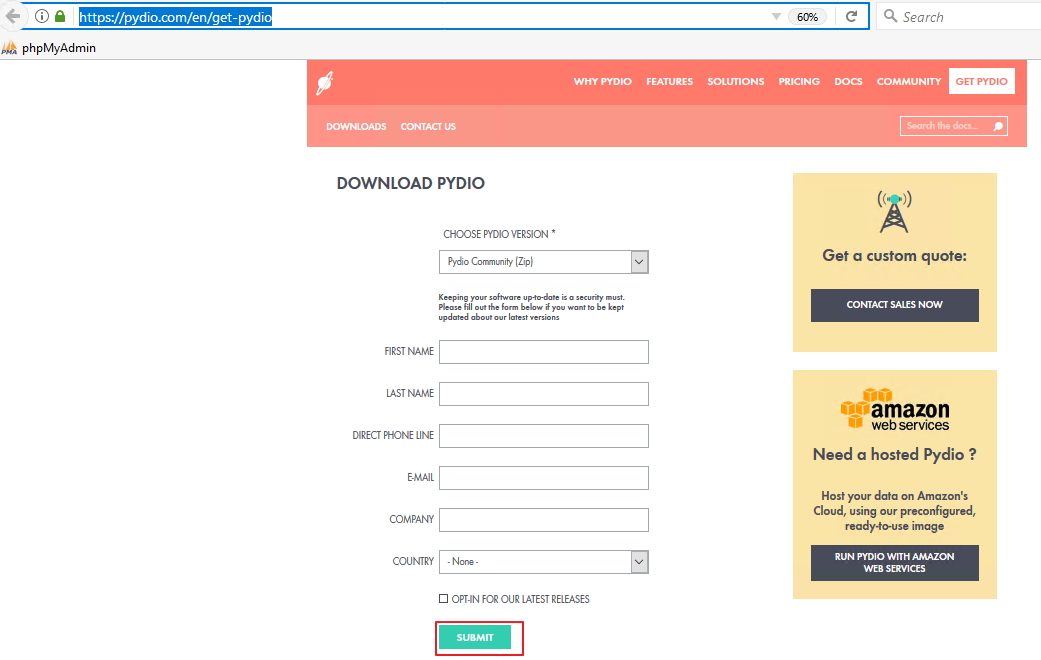
Download Pydio here – https://pydio.com/en/get-pydio
Select Pydio Community (Zip) and just click on Submit (no need to enter any data)
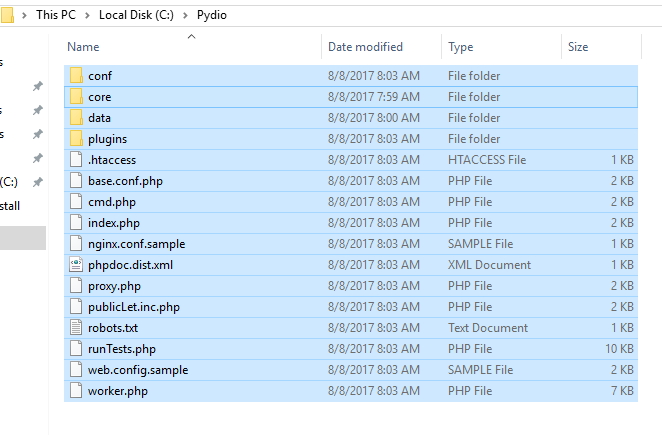
After download is finished extract files to C:\Pydio (once again – you can choose any other path for your installs)
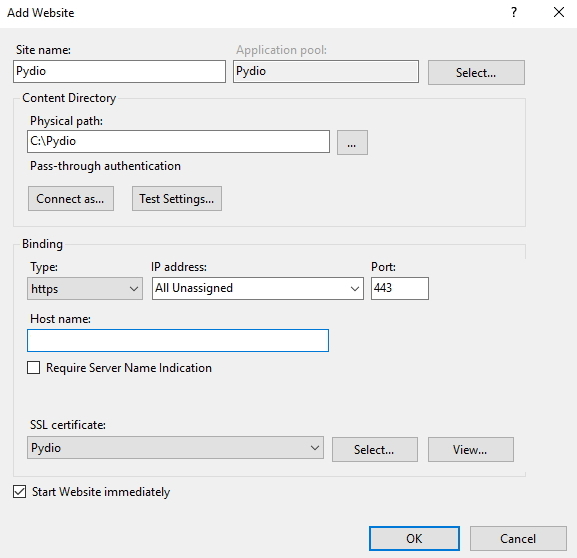
Now, back to the IIS
Start IIS Manager |Open Server | right click on Sites | Select Add Website
Give your site a name and remember what is written in Application Pool field | Physical Path – plae where you extracted your Pydio files | Binding – I recommend https: 443 |Host name: leave empty | SSL Certificate: for this LAB I`m using self-signed certificate | OK
Register new PHP for the website (same procedure as we did for the phpMyAdmin)
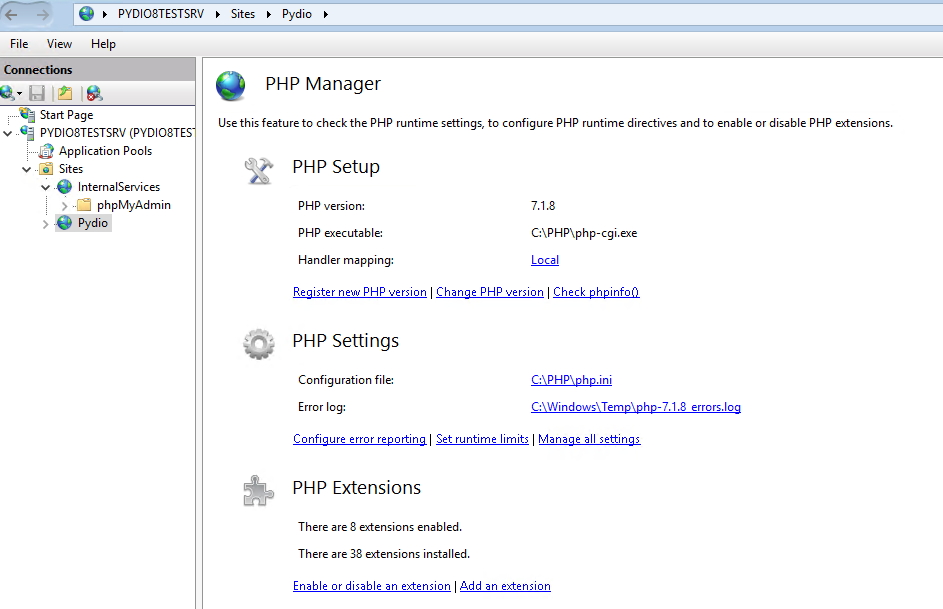
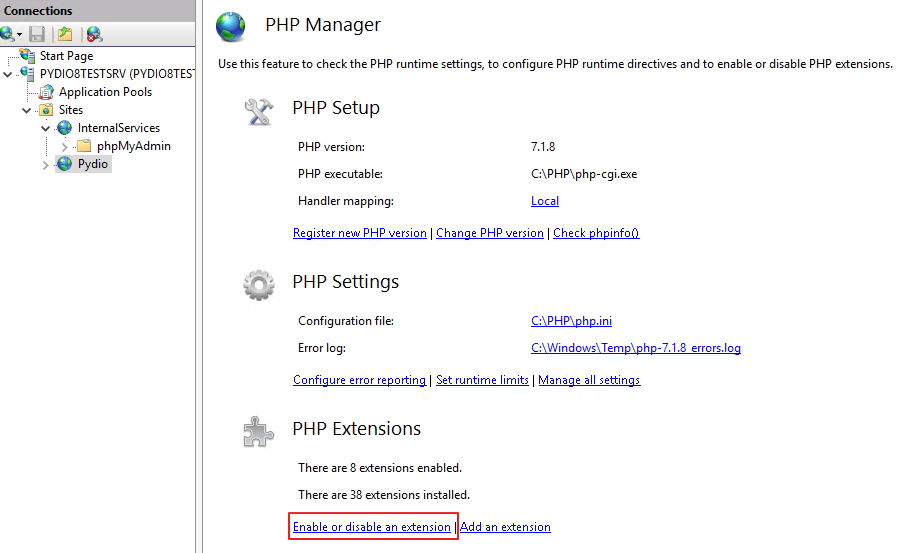
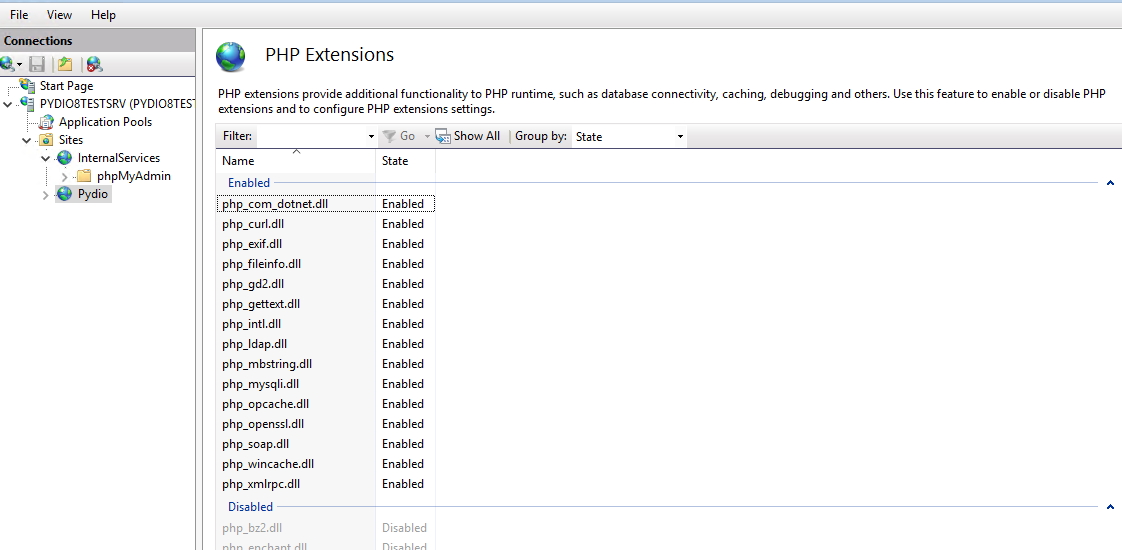
Let’s stay a bit more on PHP Manager page – click on PHP Extensions | Enable or disable an extension
You should enable following extensions
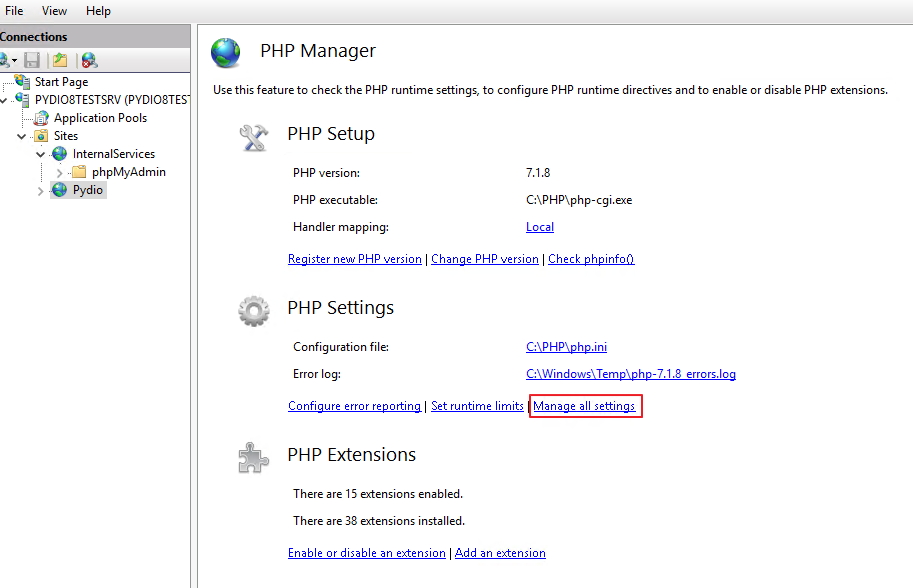
Go back to PHP Manager page and select Manage all settings
Change following values – upload_tmp_dir (I selected my InternalServices folder and created subfolder Temp)
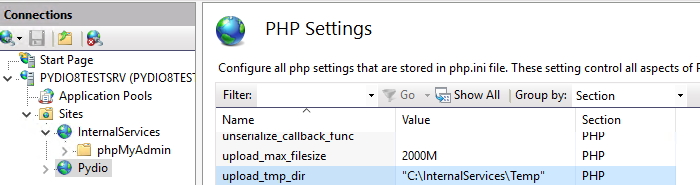
session.save_path (I selected my InternalServices folder and created subfolder Temp)

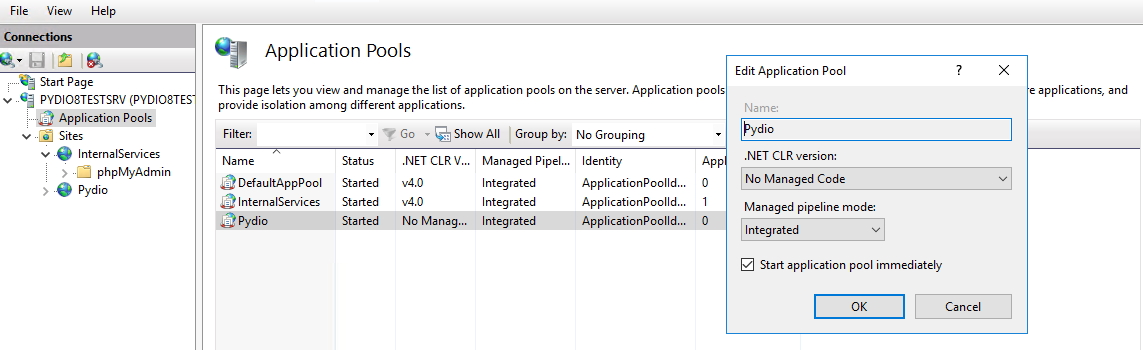
Now let`s head to Application Pools in IIS
Select Pydio Application Pool and under .NET CLR version: select No Managed Code | OK
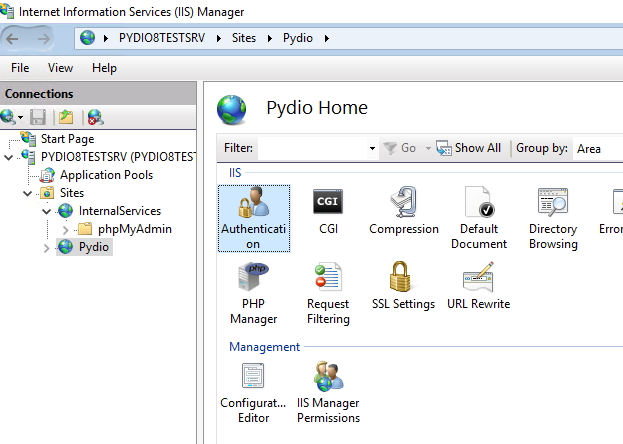
Next step – back to Pydio web app |select Authentication from middle screen
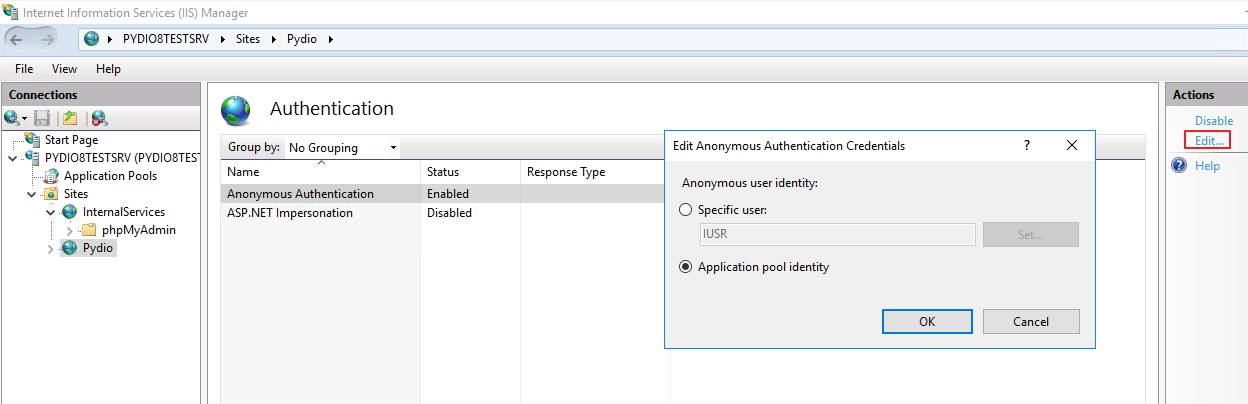
Select Anonymous Authentication | Edit from Action screen | check Application pool identity |OK
And one of the steps I haven`t found anywhere on the web, but it is very important and you will not be able to upload large files into Pydio if you don`t do this. You`ll get http error at the start of every upload larger than few MB.
We setup max file size in PHP already and if we look into settings of this LAB maximum upload size is 2GB – but when you finish installation you are not able to upload files larger than few MB
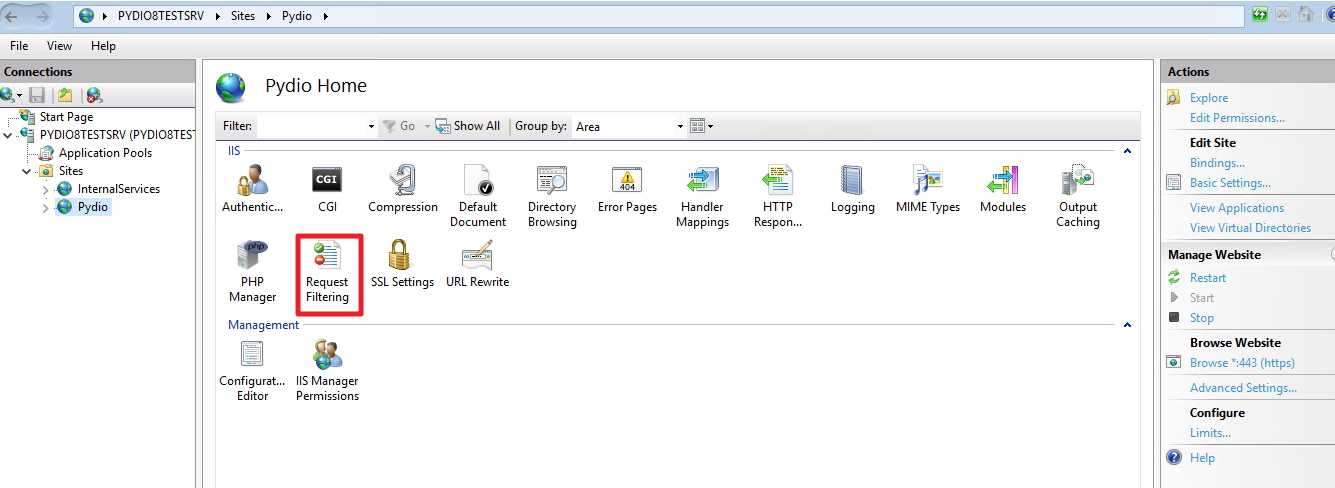
Final step that is missing is in IIS
Select Pydio website and from the middle screen select Request filtering option
Select Hidden Segments tab | right click on web.config | Edit Feature Settings…
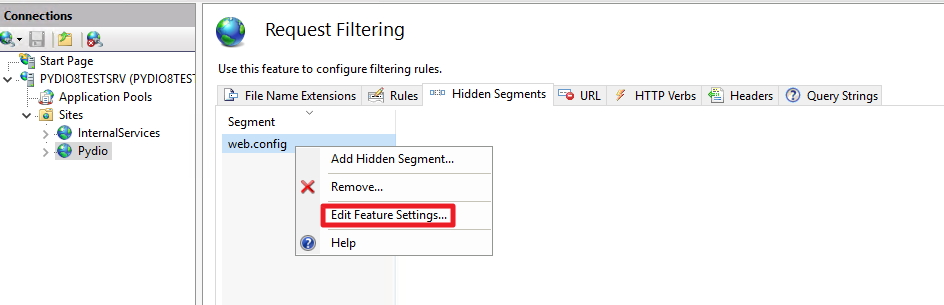
Under Requests Limits there is value “Maximum allowed content length (Bytes) – by default it is – 30000000 – that is 30MB – I`ll add two more zeroes and make it 3GB | OK
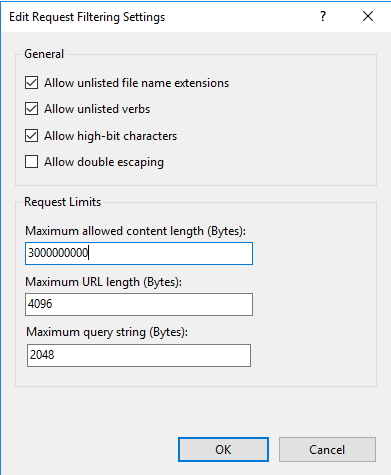
After setting this up, you won`t have problems uploading large files in Pydio.
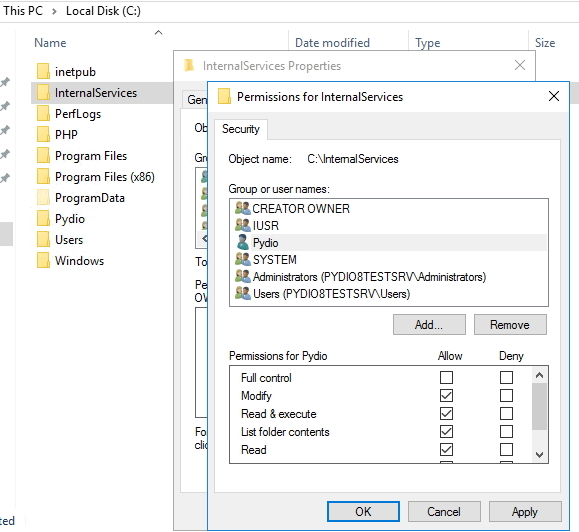
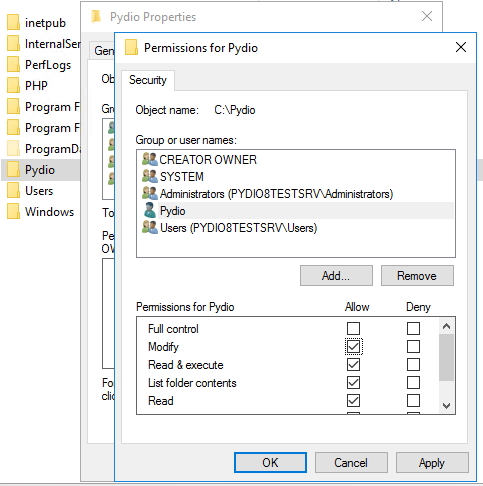
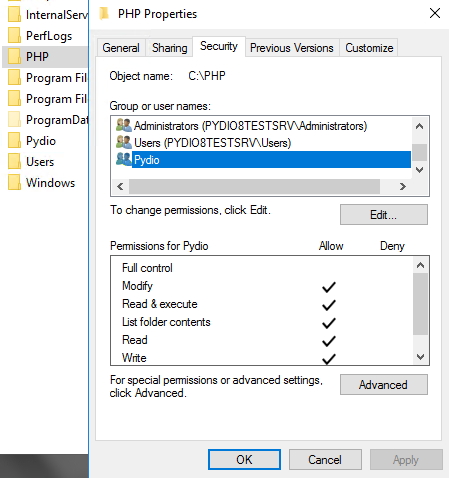
Now, next step is File Explorer – select folders InternalServices, Pydio and PHP and add
iis apppool\pydio with read&execute rights (data folder in Pydio should have Modify permissions as also temp subfolder inside InternalServices folder)
InternalServices Folder – give modify rights to iis apppool\pydio |Apply |OK (why modify rights? – inside is temp folder that pydio install reads and writes to)

Pydio Folder read&execute for iis apppool\pydio | |Apply |OK
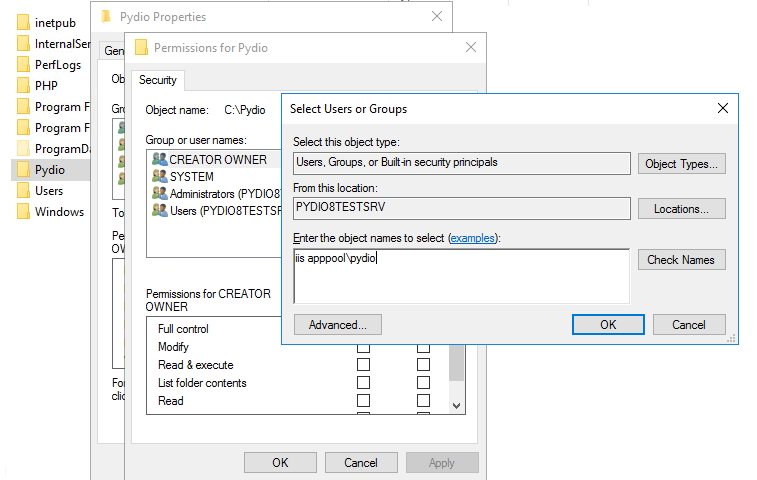
PHP folder should also have Pydio app pool as user with modify rights
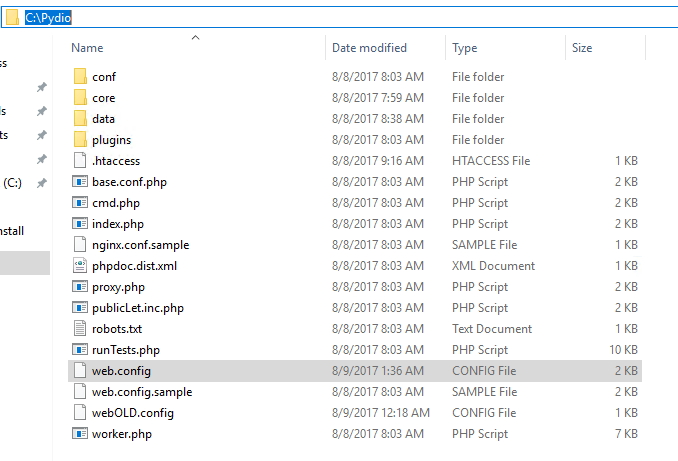
Next is Pydio folder – find web.config file in the root of the folder and open it in text editor
This is how your web.config should look like
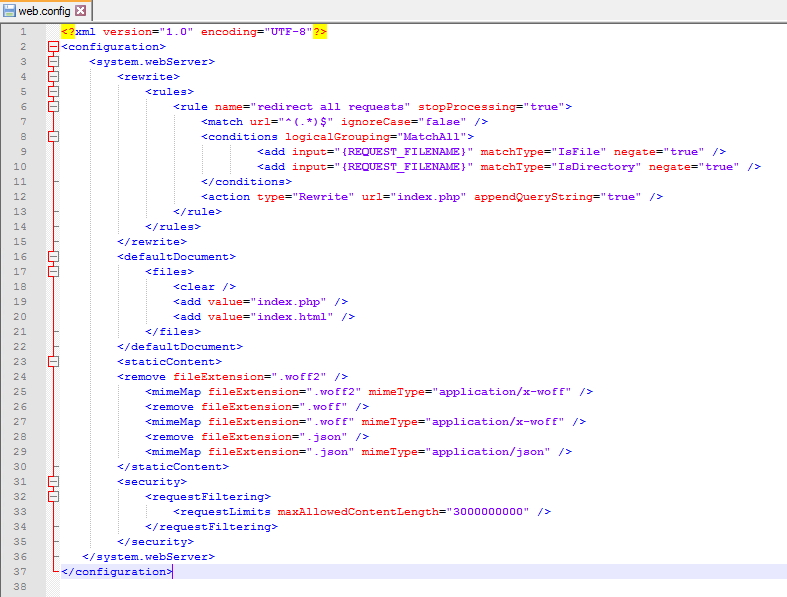
Here is the code
<?xml version="1.0" encoding="UTF-8"?>

<configuration>

<system.webServer>

<rewrite>

<rules>

<rule name="redirect all requests" stopProcessing="true">

<match url="^(.*)$" ignoreCase="false" />

<conditions logicalGrouping="MatchAll">

<add input="{REQUEST_FILENAME}" matchType="IsFile" negate="true" />

<add input="{REQUEST_FILENAME}" matchType="IsDirectory" negate="true" />

</conditions>

<action type="Rewrite" url="index.php" appendQueryString="true" />

</rule>

</rules>

</rewrite>

<defaultDocument>

<files>

<clear />

<add value="index.php" />

<add value="index.html" />

</files>

</defaultDocument>

<staticContent>

<remove fileExtension=".woff2" />

<mimeMap fileExtension=".woff2" mimeType="application/x-woff" />

<remove fileExtension=".woff" />

<mimeMap fileExtension=".woff" mimeType="application/x-woff" />

<remove fileExtension=".json" />

<mimeMap fileExtension=".json" mimeType="application/json" />

</staticContent>

<security>

<requestFiltering>

<requestLimits maxAllowedContentLength="3000000000" />

</requestFiltering>

</security>

</system.webServer>

</configuration>
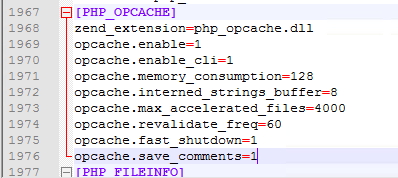
Now, go to PHP folder – open PHP.ini file
Find line that says – extension=php_opcache.dll
![]()
Change name of the line to
zend_extension=php_opcache.dl and add following code
opcache.enable=1

opcache.enable_cli=1

opcache.memory_consumption=128

opcache.interned_strings_buffer=8

opcache.max_accelerated_files=4000

opcache.revalidate_freq=60

opcache.fast_shutdown=1

opcache.save_comments=1
This is how it should look like | Save changes
Now go to System | Advanced system settings | Advanced tab | Environment Variables | selec PATH from System variables |Edit | Add PHP path | OK
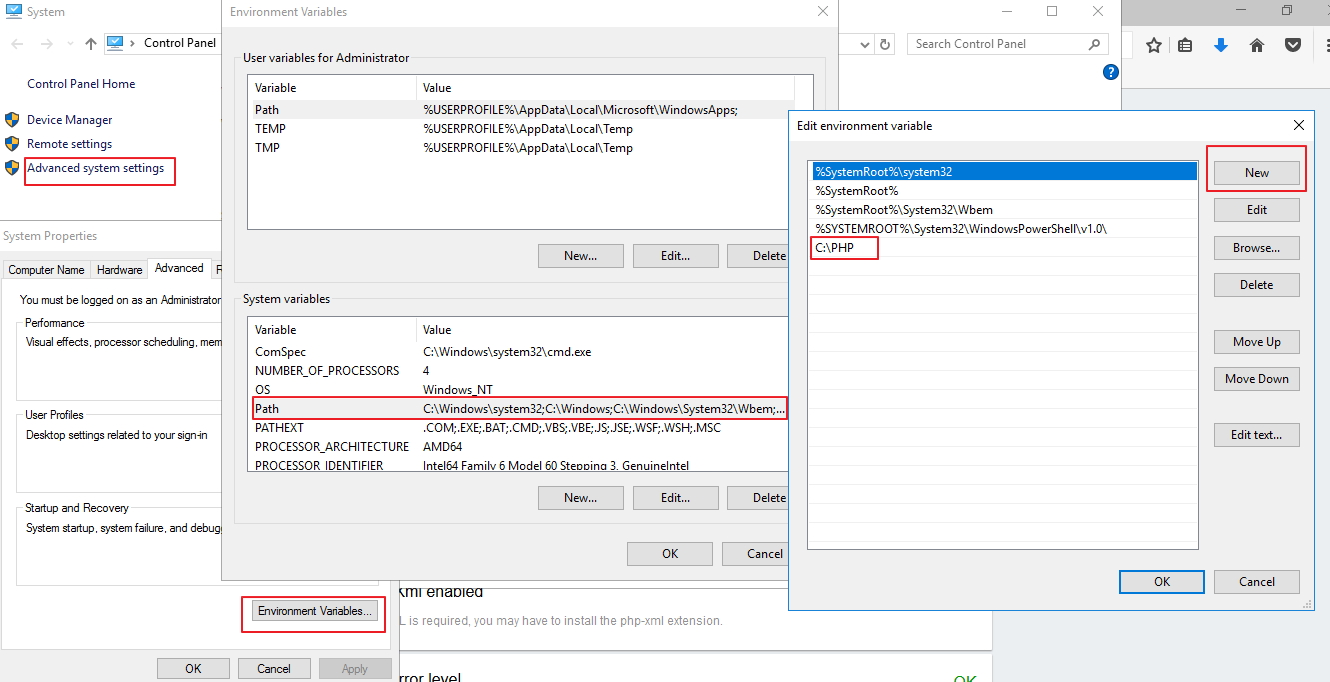
Now from System variables choose PATHEXT | Edit and enter .PHP to the end. |OK – confirm everything and exit

Last step regarding PHP would be to create on the desktop little file and enter following code into it
Windows Registry Editor Version 5.00
[HKEY_LOCAL_MACHINE\SOFTWARE\Classes\.php]
@="phpfile"
"Content Type"="application/php"
[HKEY_LOCAL_MACHINE\SOFTWARE\Classes\phpfile]
@="PHP Script"
"EditFlags"=dword:00000000
"BrowserFlags"=dword:00000008
"AlwaysShowExt"=""
[HKEY_LOCAL_MACHINE\SOFTWARE\Classes\phpfile\DefaultIcon]
@="C:\\PHP\\php-win.exe,0"
[HKEY_LOCAL_MACHINE\SOFTWARE\Classes\phpfile\shell]
@="Open"
[HKEY_LOCAL_MACHINE\SOFTWARE\Classes\phpfile\shell\Open]
@="&Open"
[HKEY_LOCAL_MACHINE\SOFTWARE\Classes\phpfile\shell\Open\command]
@="\"C:\\PHP\\php.exe\" -f \"%1\" -- %~2"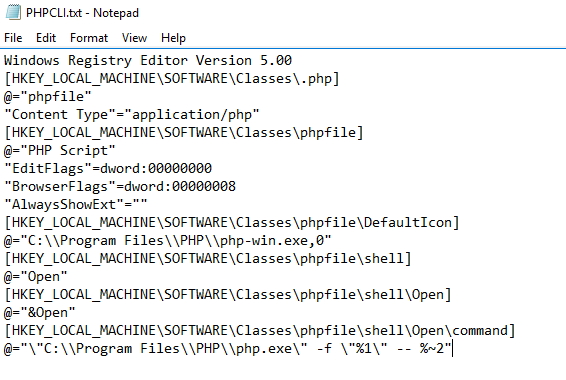
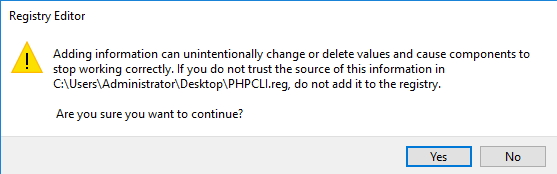
Save file and rename .txt extension to .reg
Double click on it
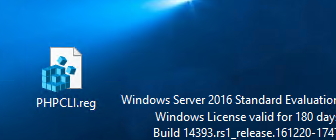
Yes
OK
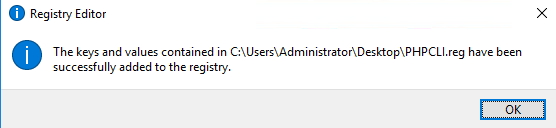
Reboot server
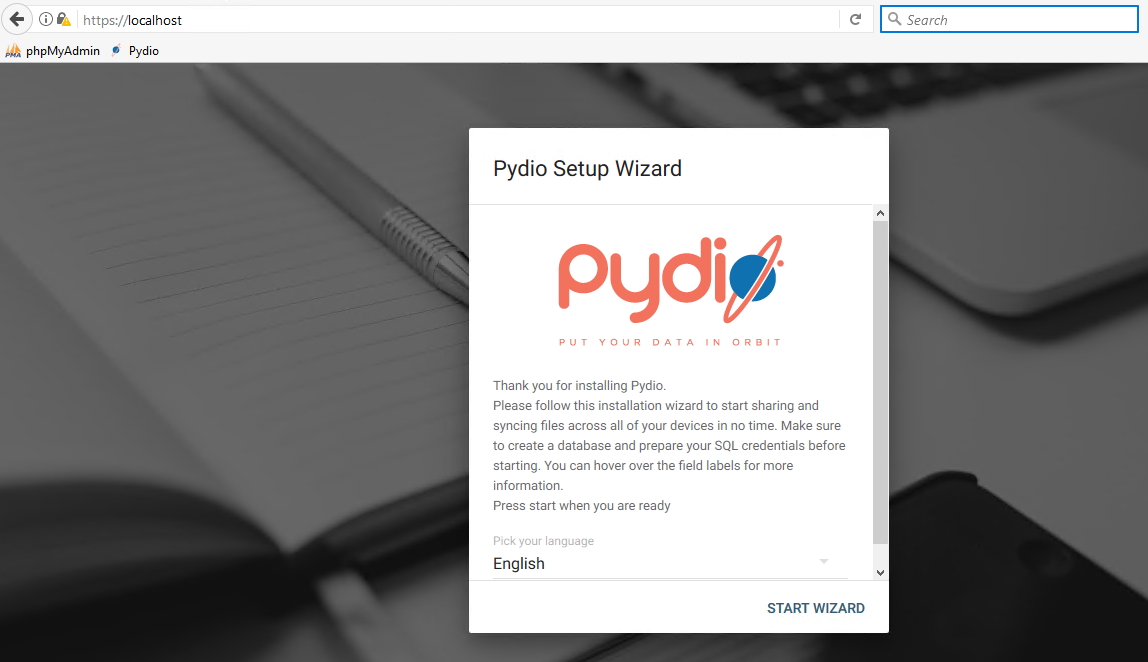
Now, moment of truth
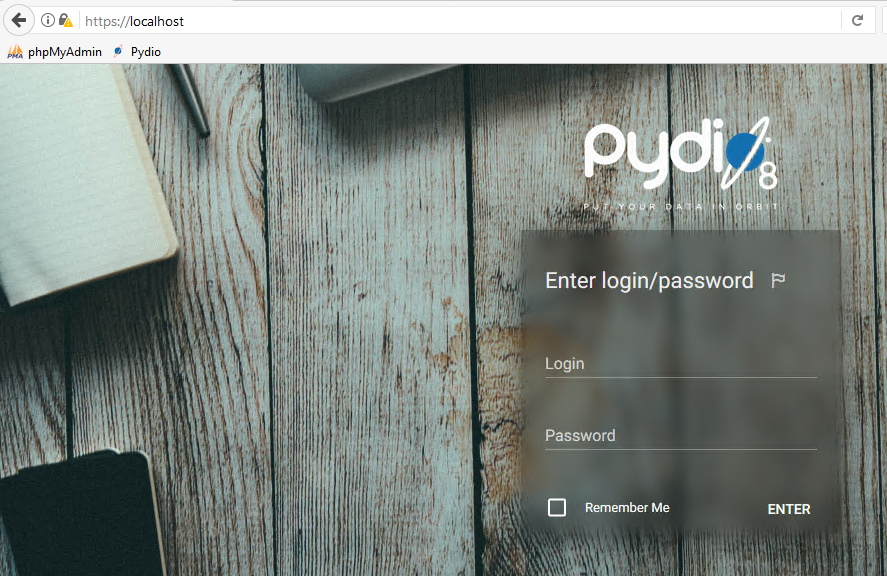
In my case Pydio is in the root with https
START WIZARD
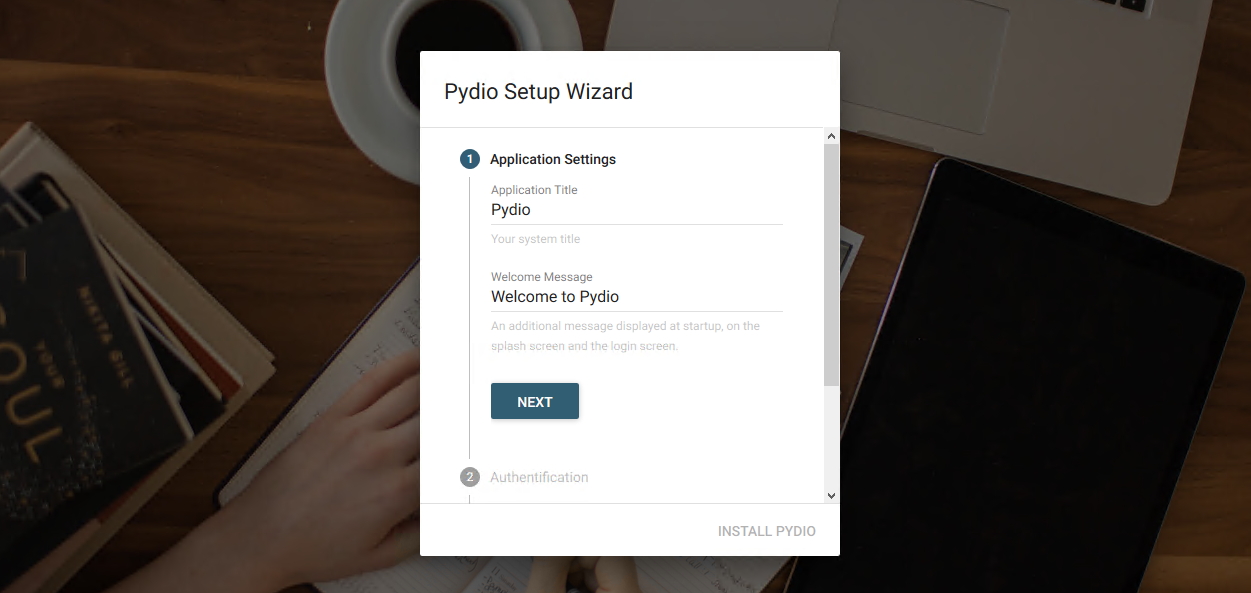
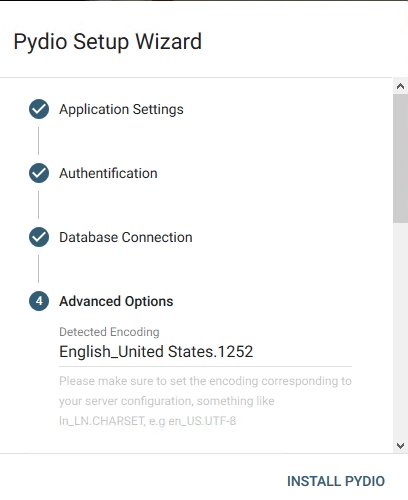
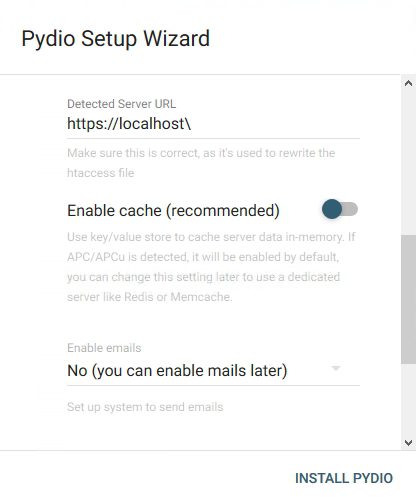
I`ll leave default settings |Next
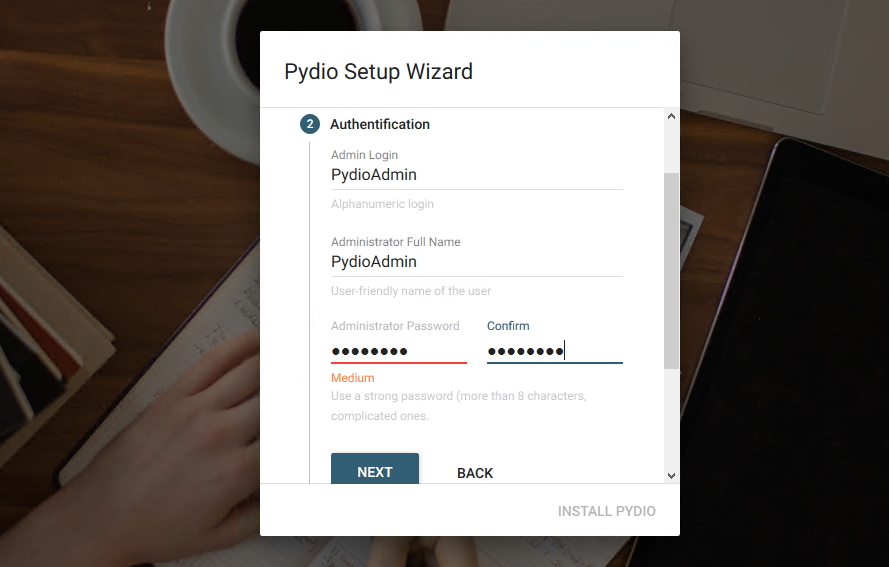
In next step you will have to define administrator for your Pydio install – always use strong passwords! | Next
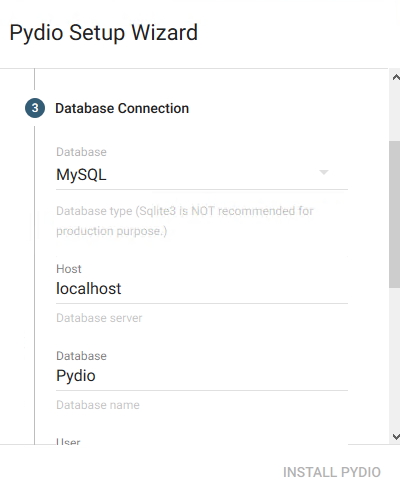
Next are database data – I created database named Pydio earlier and will be using root user and password in this LAB (in production you should use dedicated user for every DB)
Test DB Connection (enter correct name of the database, watch out for case sensitivity)
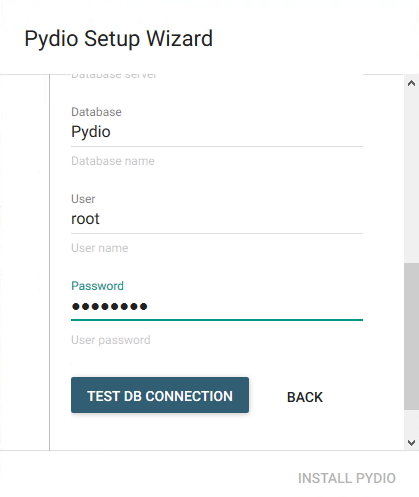
DB test was success

Install Pydio
Success
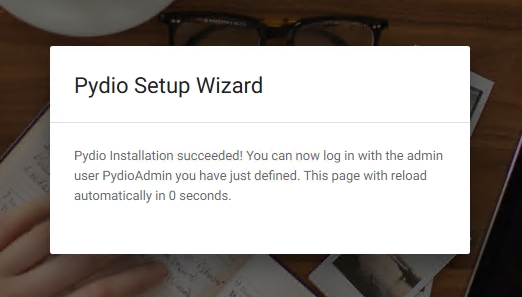
Login screen showed automatically
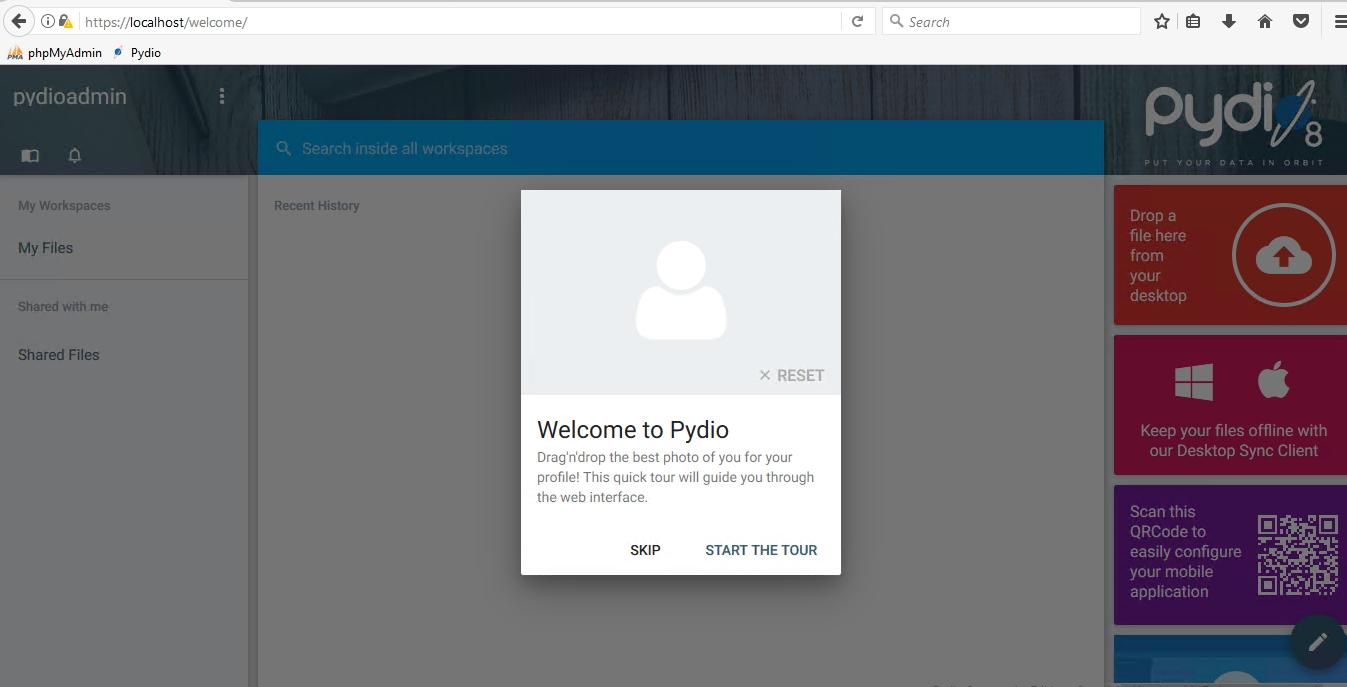
Installation was success
This installation works for me, although as I already mentioned in the first part, I have problems with large uploads. They just break in the middle of the upload. I will check sometimes in the future, maybe it is
just weak hardware of my test machine. If you have anything to add, please email me, you can find Contact details under contact tab.