I’m a huge fan of Azure Stack and love to use it for many scenarios in my work/homelab. Often, I need to connect Azure Stack to other hardware/software within my lab. That is when I rely on Site to Site VPN solutions.
One thing I’m not huge fan of in Azure stack is integrated VPN solution. I usually use third party solutions like Fortigate.
In this scenario I will show how to connect Azure Stack to Intel NUC in my local network. I have configured Fortigate VM in Azure Stack, and in my physical network there is one Fortigate 60D and behind it is Intel NUC with installed Windows Server 2016.
I would not recommend this scenario for production environment that relies on internet connection. In production environment, security should be a bit beefier.
Lab setup
So, here is my LAB setup.
Azure Stack (Main Office)
Azure Stack has public IP 192.168.102.32 that is going to Fortigate VM. Behind Fortigate VM is a small network of Windows Server 2016 VMs on 172.20.2.0/24 subnet.
VM I want to have connection to is on IP address 172.20.2.5/24
Physical network (Branch Office)
I have Fortigate 60D as a main router with public IP 10.10.9.102. Behind it is a Intel NUC which has Windows Server 2016 installed on it and it on IP address 192.168.40.5/24 (192.168.40.0/24 subnet)
I want Azure Stack VM on IP address 172.20.2.5 to communicate with Intel NUC behind Fortigate 60D on IP 192.168.40.5 as if they are on the same network.
Azure Stack Setup
Ok, first we will setup Fortigate VM on Azure Stack. This lab assumes you already have everything configured in your network and you just want to setup Site to Site VPN.
From VPN menu select IPsec Wizard
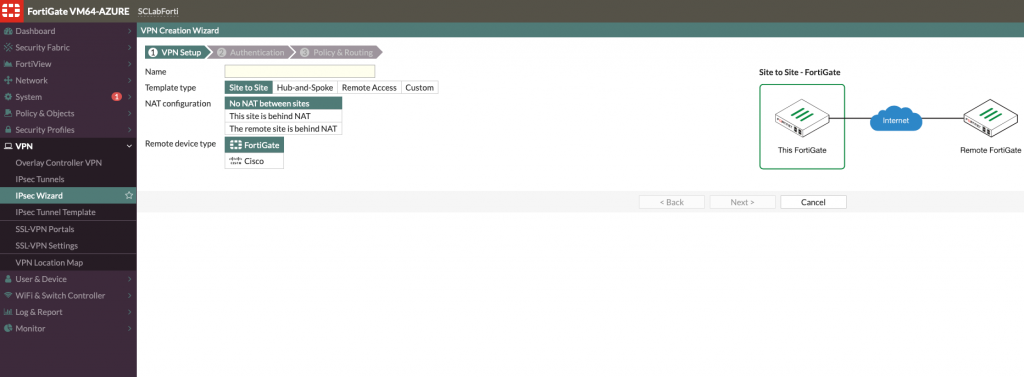
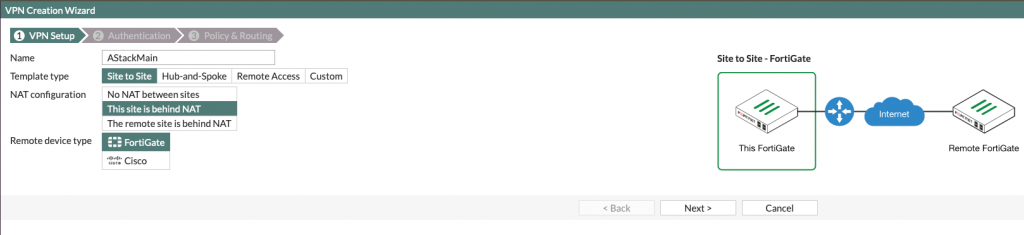
I will give name AStackMain for this site since it will simulate Main Office.
Template Type is Site to Site
NAT configuration – This site is behind NAT (This also works with No NAT between sites option if you have all default within your local network)
Remote device type – FortiGate (I will be connecting to Fortigate 60D)
Next
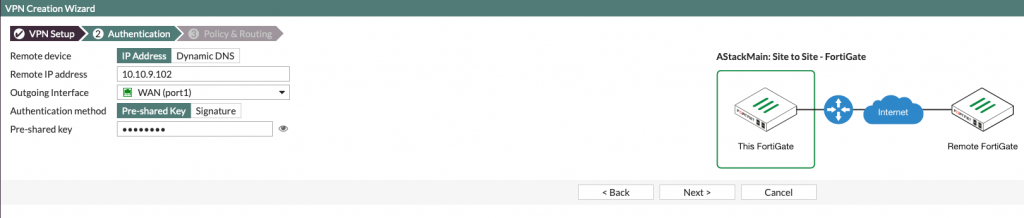
Remote device – IP address
Remote IP address – public IP address of remote Fortigate device – for me it is 10.10.9.102
Outgoing interface – port1 (since it is outside facing port in my Fortigate setup)
Authentication method – Pre-shared key (for this occasion enough, but in real world, certificates would be included). Type in a strong phrase and remember it, we will need it again in setup on Branch Office.
Next
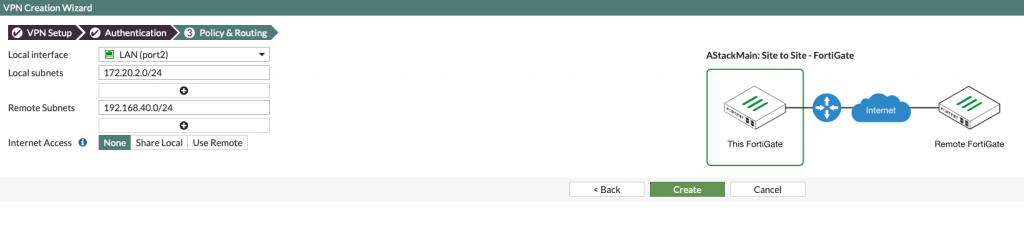
Last screen is about local network on main site and branch site.
Local interface – port2 (you should select your LAN facing interface)
Local subnets – 172.20.2.0/24 (that is LAN subnet on my Azure Stack)
Remote subnets – 192.168.40.0/24 (that is LAN subnet of Intel NUC behind Fortigate 60D)
Create
OK – all is set on Fortigate VM in Azure Stack
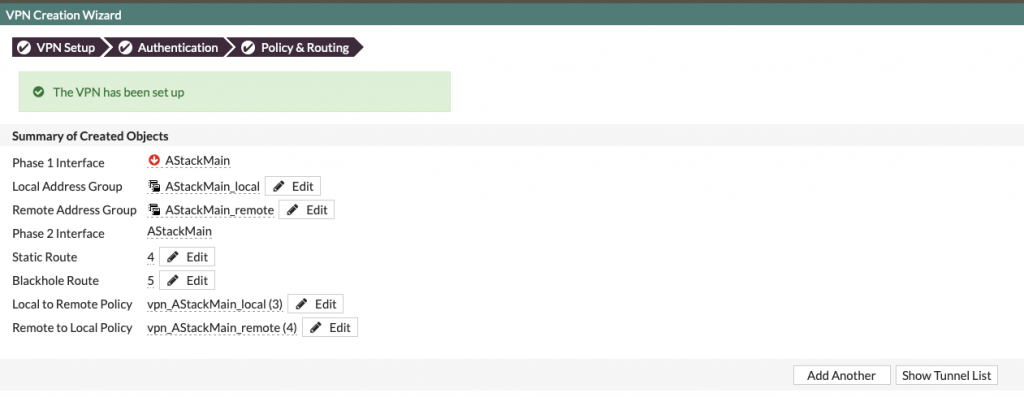
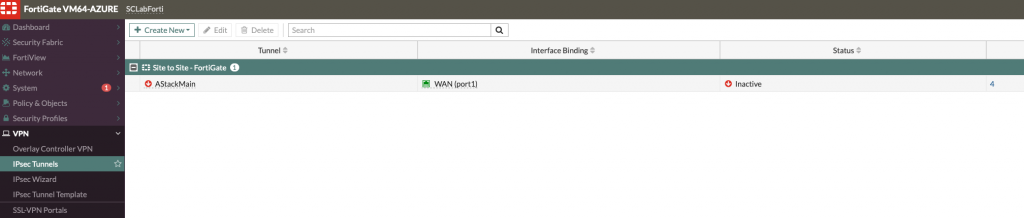
Here is how created tunnekl on Azure Stack (Main Site) looks like
Intel NUC (Branch Office)
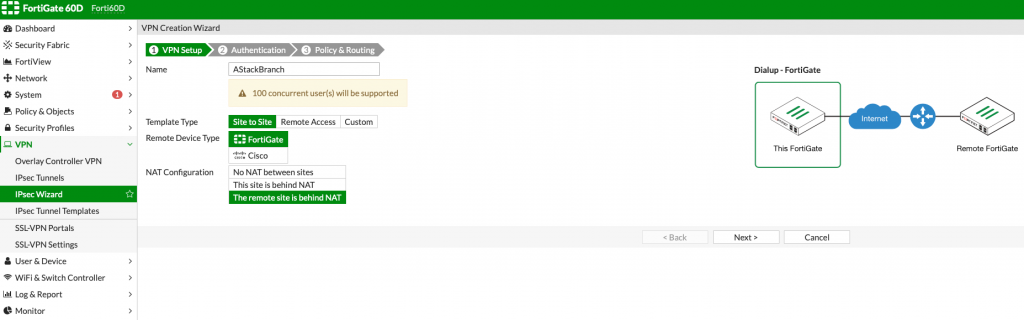
Next part of configuration will be done on Fortigate 60D which will act as Branch Office for this scenario.
Location is again VPN | IPsec Wizard
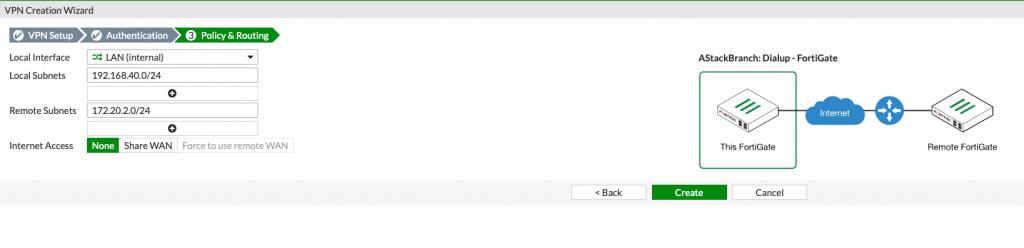
Name: AStackBranch
Template type: Site to Site
Remote Device Type: Fortigate
NAT Configuration: The Remote site is behind NAT (This also works with No NAT between sites option if you have all default within your local network)
Next
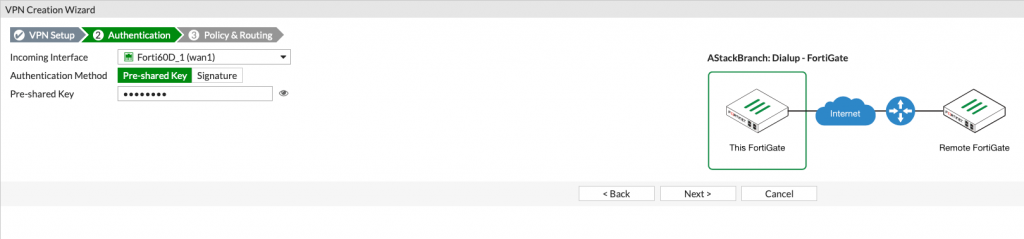
Incoming interface is wan1 in my case, since that is my public port on Fortigate 60d
Authentication Method Pre-shared Key
Pre-shared Key – type in same thing you already typed at Main Office Pre-shared Key.
Next
Local interface – select your LAN interface on Fortigate
Local subnet – 192.168.40.0/24
Remote subnet – 172.20.2.0/24
Create
VPN is set
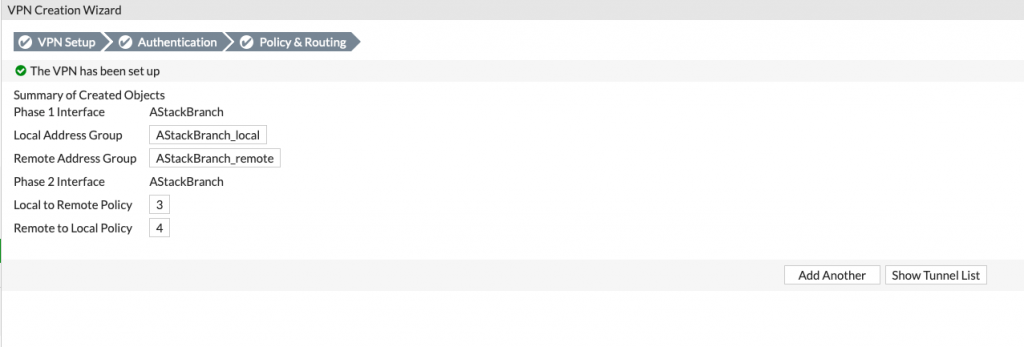
Here is what it looks like on Fortigate 60D

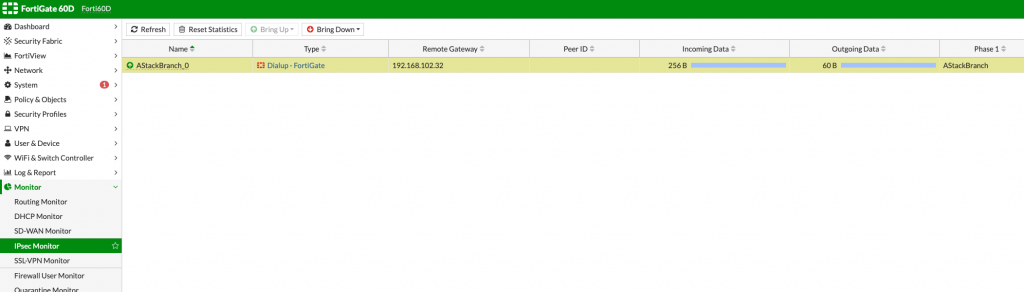
In my case, status is immediately up since I set ping on the both sides of tunnel.
You can bring up/down this tunnel from both Main or Branch side by going to:
Monitor | IPsec Monitor
There are Bring Up and Bring Down buttons at the top, with which you can start or stop your site to site vpn.
Testing
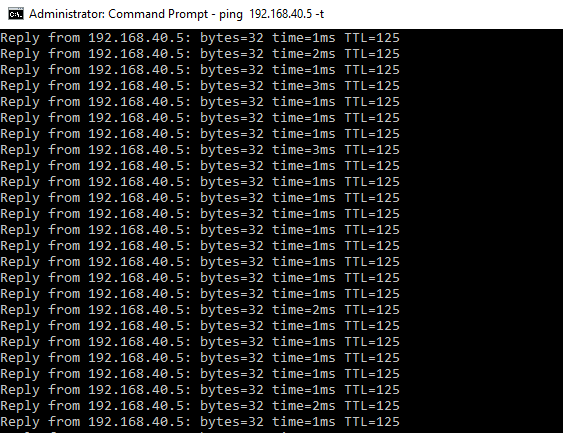
I setup ping from both sides – 172.20.2.5 to 192.168.40.5 and vice versa.
Here is what it looks like after tunnel is up
172.20.2.5 pinging 192.168.40.5
192.168.40.5 pinging 172.20.2.5

I also tested with file share and RDP and all the services are working.
This whole scenario can also work without selecting any NAT options on NAT configuration, but you should be also fine with my setup, it should work.
You should have properly set Fortigate as router and firewall for this to work.