GnuPG is wonderful and free tool which can help you encrypt your data and communication.
GnuPG is free and is already embedded into some Linux distros. Ubuntu is one of them, and I will use it today. Also, it works on Windows and Mac with appropriate apps installed. I will cover all the basic details for file encryption for your personal use in this guide.
If you are interested more in GnuPG, you can visit they site on this link.
What is the plan for this guide?
I will show installation and key generation procedure in Linux, we will also encrypt a file, send it to Windows machine and see if we can read it. This guide will only cover encryption and decryption of files for your own personal use, not exchanging files with third parties, so this tutorial is valid if you want to protect your own files for your usage.
Linux side steps
Installation
I’m testing this on Ubuntu 19.10 with GUI installed.
Lets first check if GnuPG is already installed.
Enter following command into terminal
apt-cache policy gnupg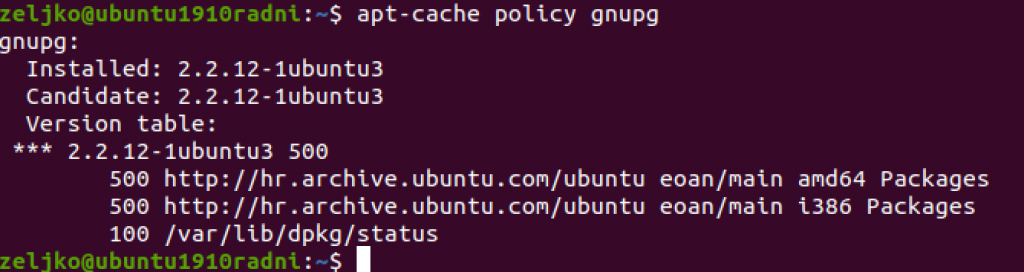
Ok, so I already have GnuPG installed.
This tool should come by default with Ubuntu. In case it is not in your installation, to install it, you will need to run following:
sudo apt install gnupg2I would also like to have some kind of frontend for GUI in Ubuntu.
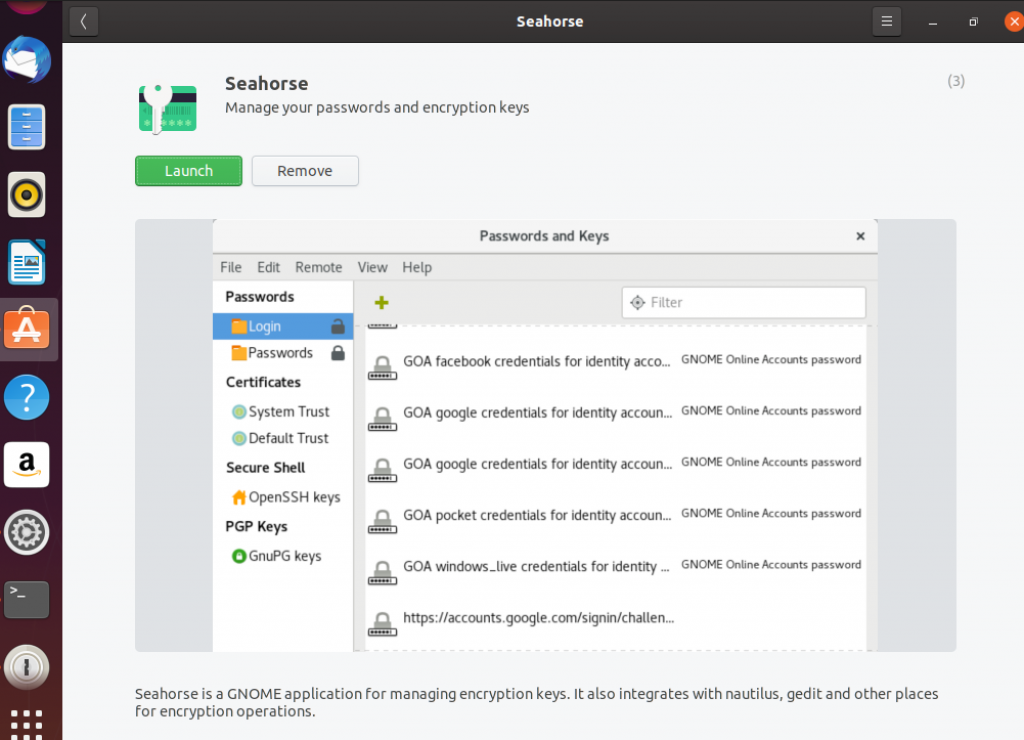
Open Ubuntu Software Store and search for Seahorse.After you found it – install it if it already haven’t been installed.
On my Ubuntu install it is already installed by default.
Last installation step. I would like integrate GnuPG with my File Explorer (Nautilus) so I can encrypt and decrypt files with right click on a file.
sudo apt-get install seahorse-nautilus -y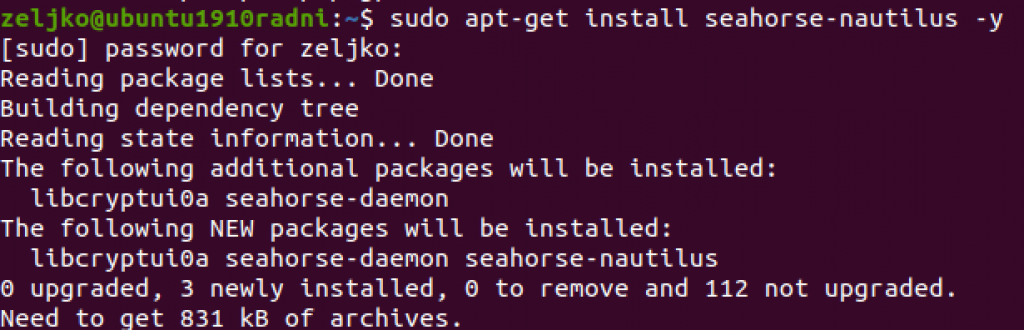
We will need to restart Nautilus to make this install active
killall nautilus
After I reopened Nautilus, and right clicked on a file, I got option to encrypt.
Great.
But we cannot encrypt anything yet because we have to generate keys.
Generate Keys
We will start procedure by entering following command
gpg --full-generate-keyWe will select 1 – RSA and RSA
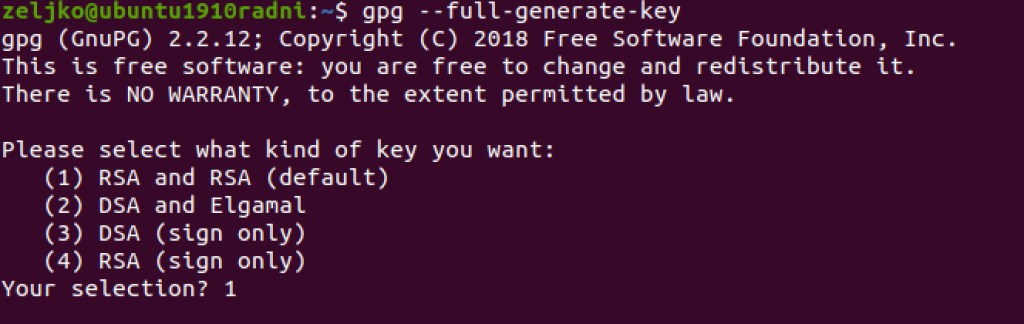
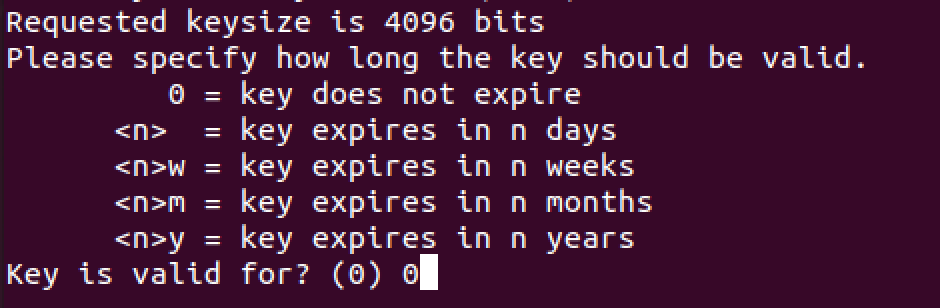
We want maximal protection so we will select 4096 as our RSA keysize

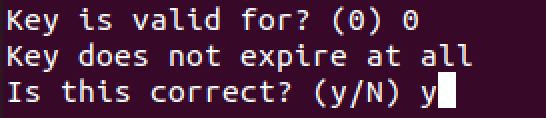
Expiration date is our next step. I will select 0 (zero) since I don’t want my key to expire. You can also select various other periods of validity if this does not fit your need.
You will be asked to confirm. Select yes
Identity construction will be our next task. Enter your real name – I entered mine

Next, enter your email address

After you entered your email you will be asked to enter comment, this you can skip if you don’t have any

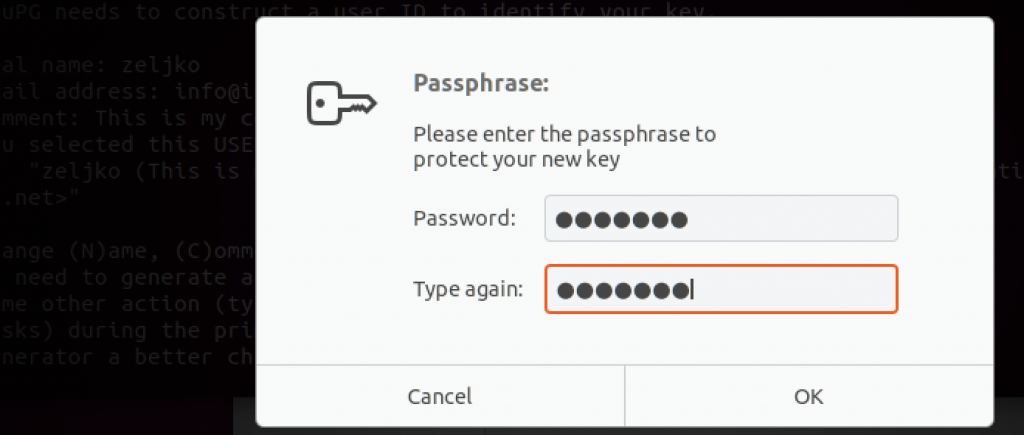
You will then be asked to enter password to potect your private key. Enter strong password twice and select ok.
Be sure to remember this password.This password also needs to be strong and safe. If you lose this password you will not be able to decrypt your files.
After you confirmed your password it will take a short time to generate your keys…
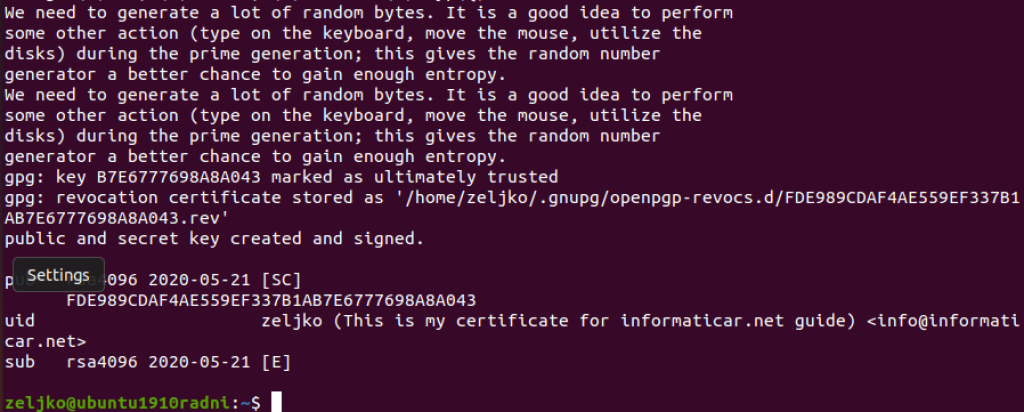
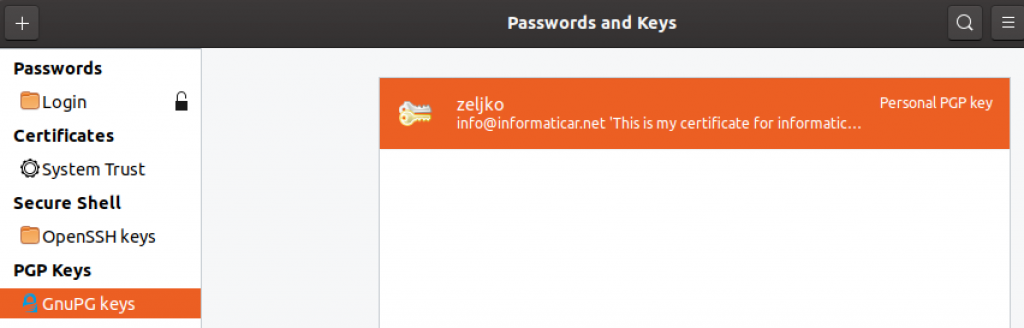
You will also be able to see these keys in your “Seahorse” app which we installed earlier under PGP Keys section.
Before we proceed, we will also create revocation certificate. In case your certificate gets compromised, you will need revocation cert.
–output will specify directory where we will save revocation cert.
–gen-revoke will create revocation certificate. You will need to specify email address with which you generated your certificate.
gpg --output ~/revocation.crt --gen-revoke info@informaticar.netWhen asked if we want to create revocation cert for the key – confirm with “y”
You will also be asked for the reason of revocation – since we don’t know what the reason will be, we will select 1.
Enter the description if you want, and Confirm with “y” in the end.
It would be wise to keep this cert in a safe place.

Encrypting/Decrypting file
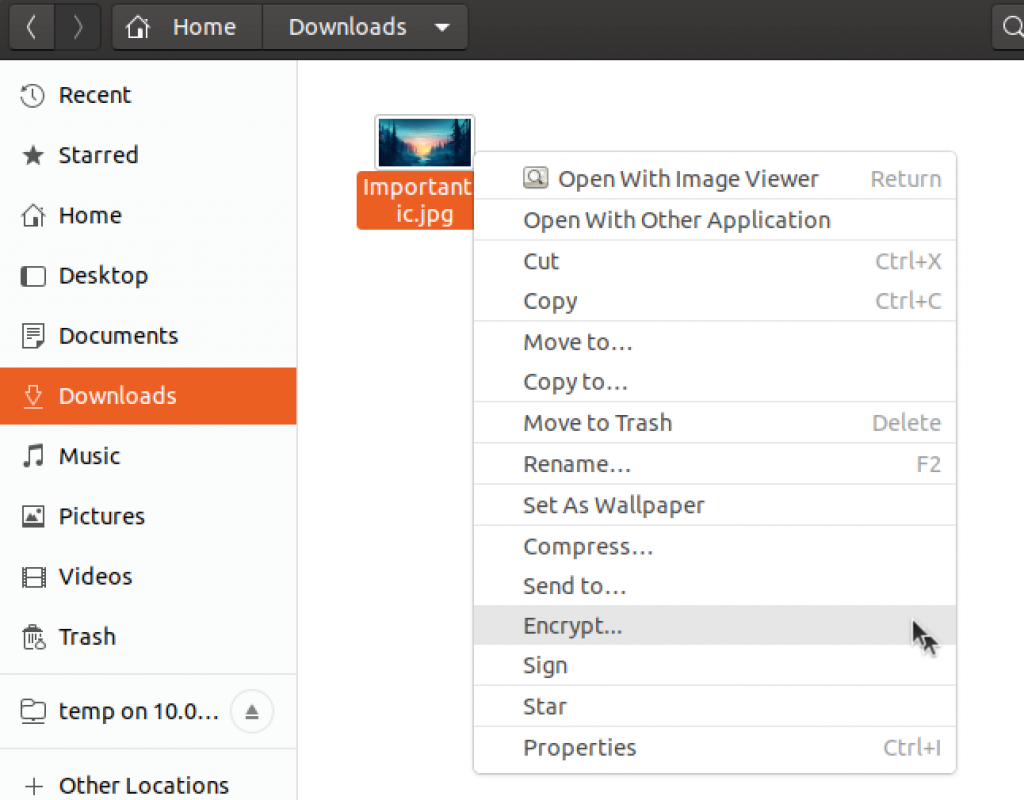
We already install encryption support for Nautilus (file explorer). Now we will test it.
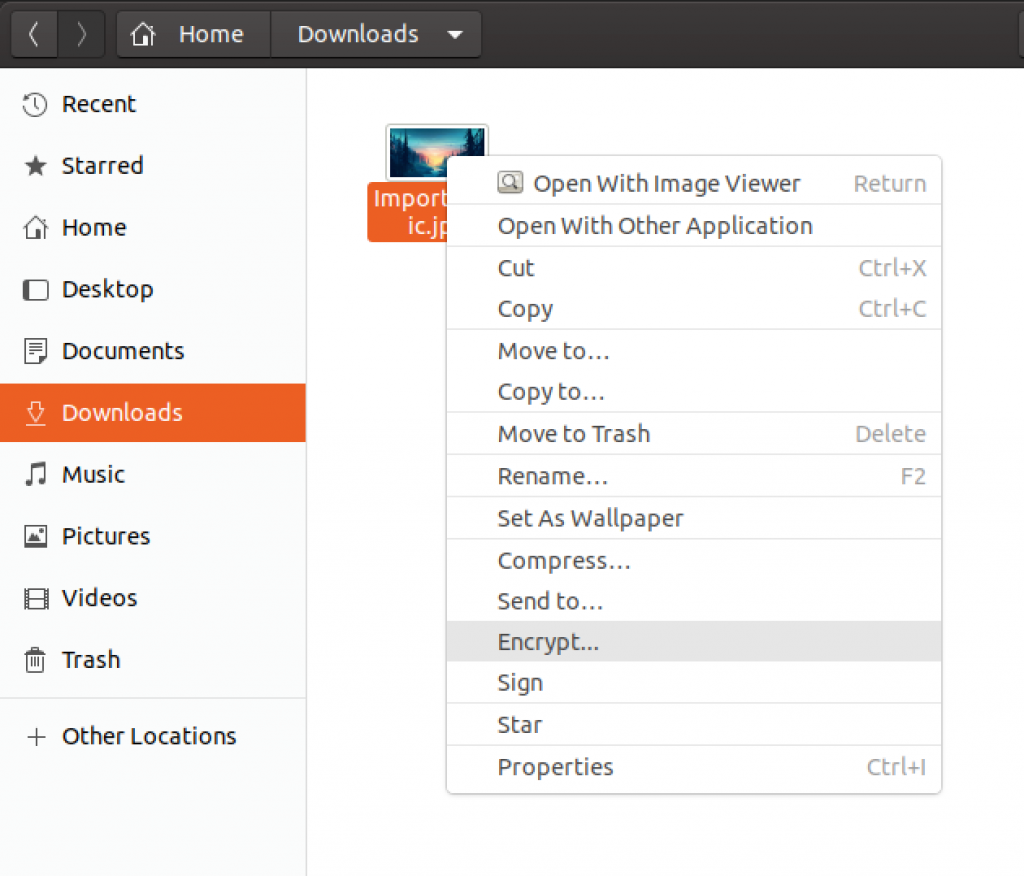
I have an important picture in my downloads folder that I want to encrypt.
Just right click on the file, and select encrypt.
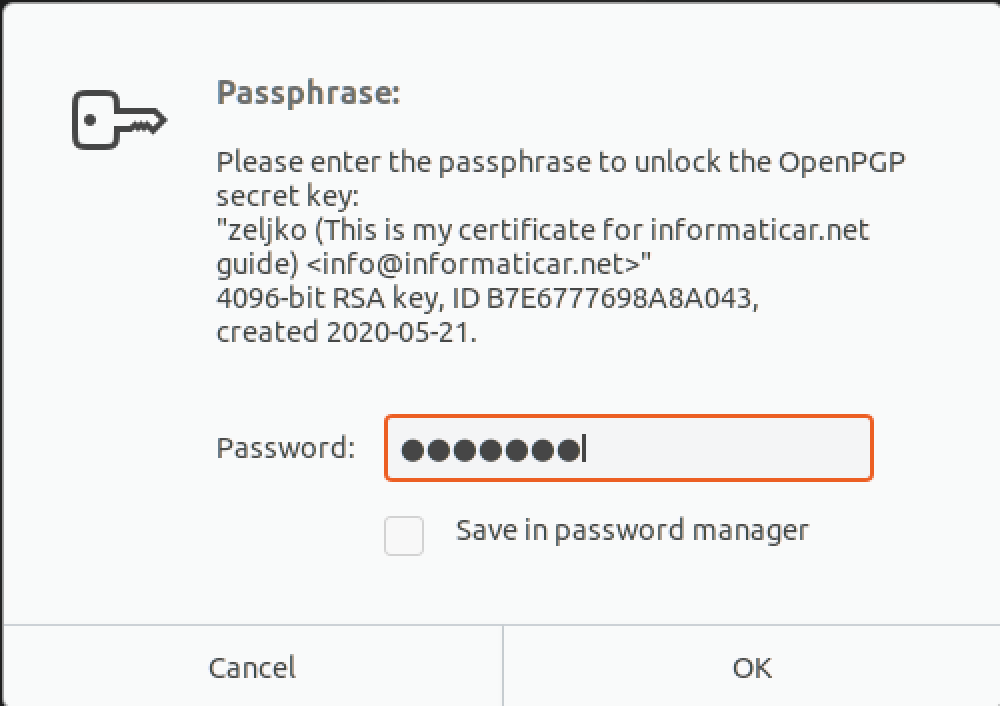
I will select created key (zeljko, infoATinformaticar.net) and also sign message with the same key.
confirm with OK

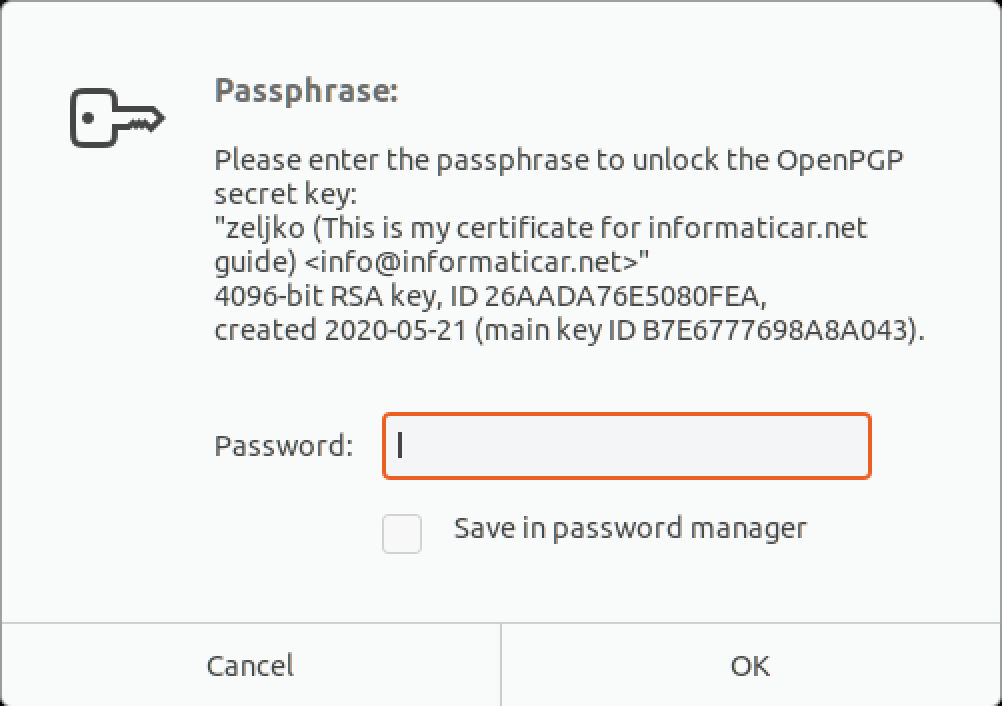
You will now be asked for a passphrase you assigned to your key.
Again confirm with OK
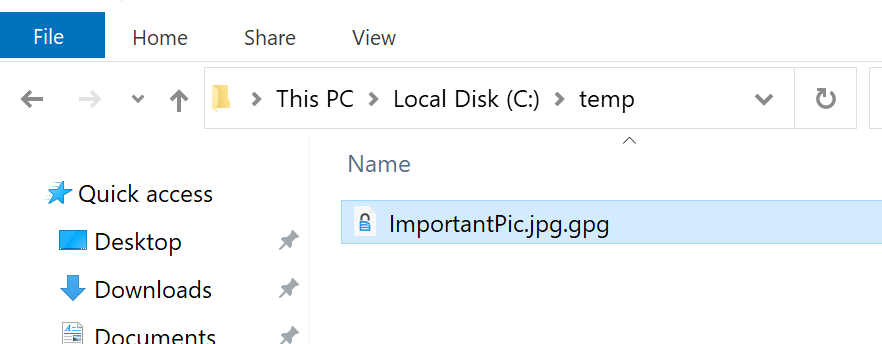
We are done with the encrption. File with .pgp extension is created.
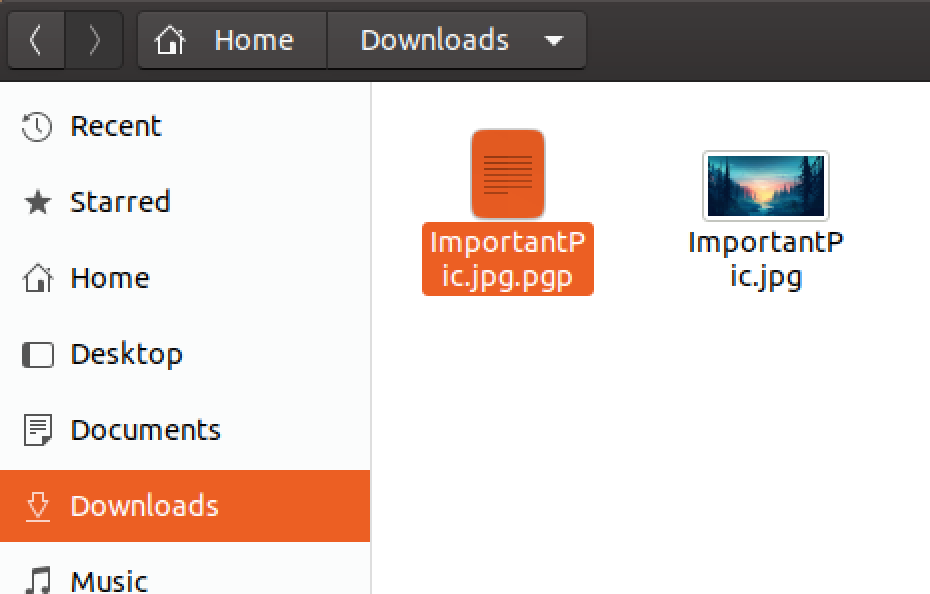
I will now delete .jpg file and just leave .pgp file in my Download directory.
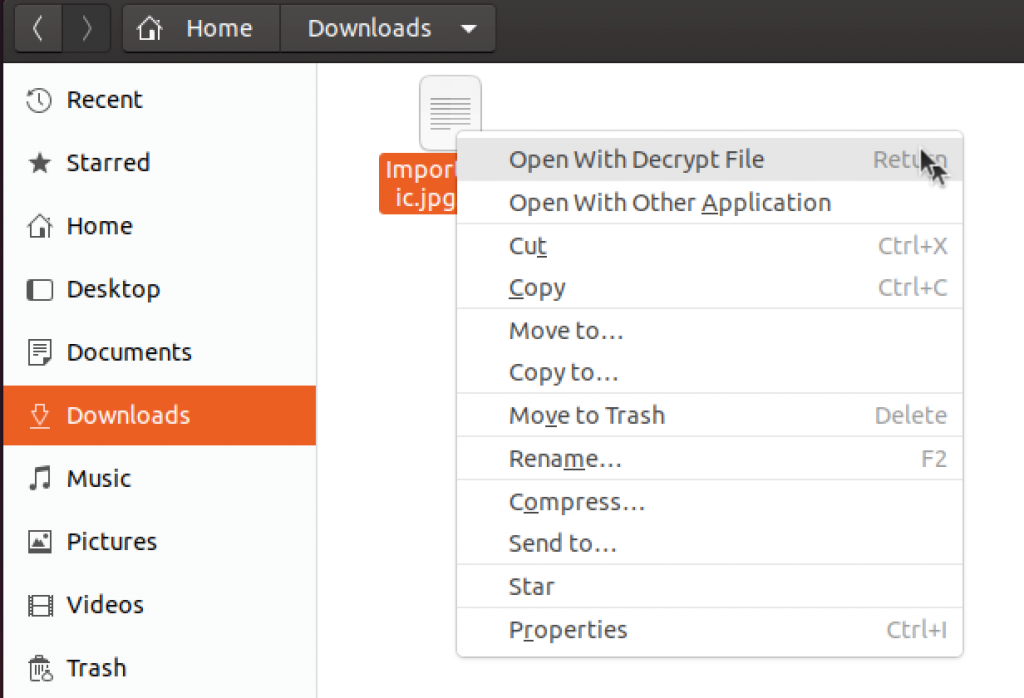
Now, if we want to decypt and see the file, we will right click on ImportantPic.jpg.pgp in Download folder and select
“Open with Decrypt File”
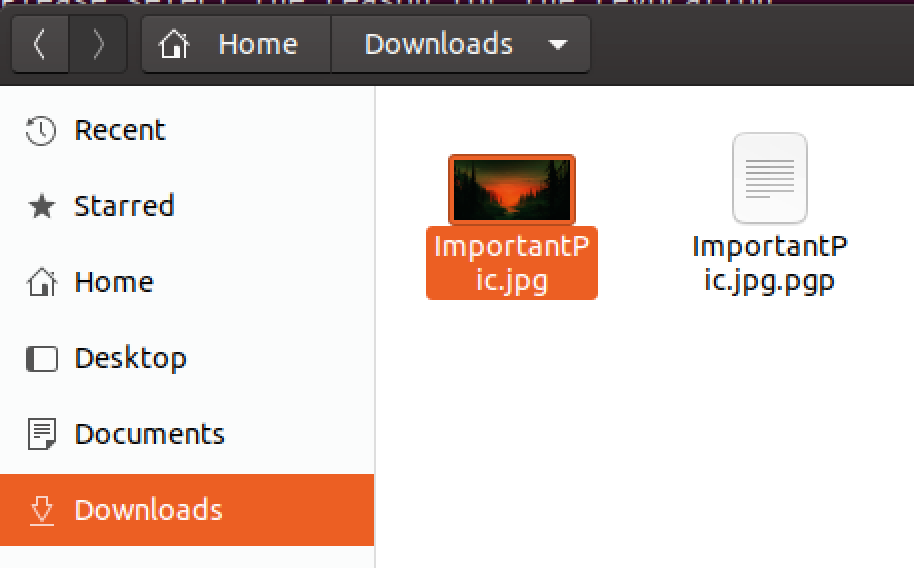
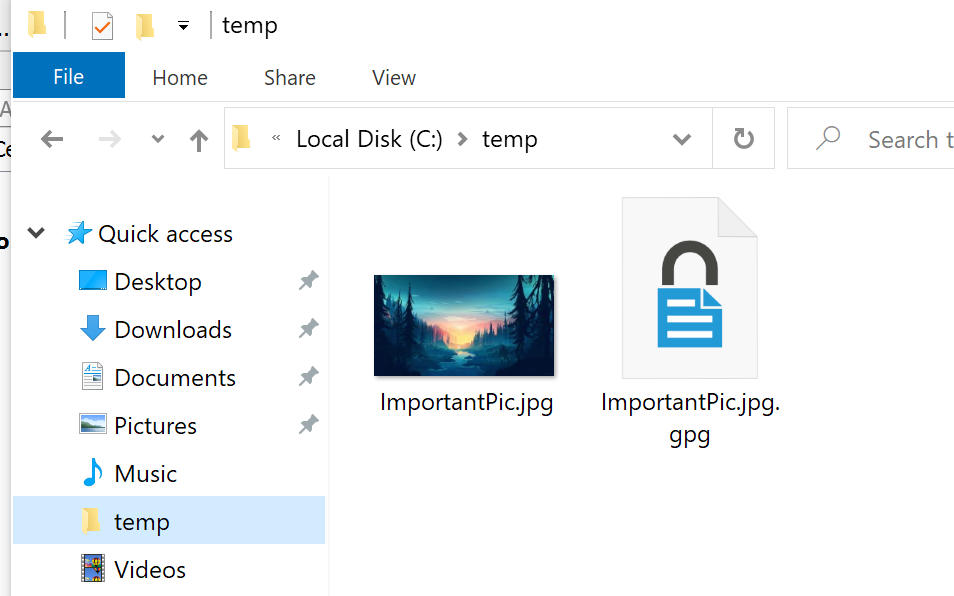
ImportantPic.jpg will appear in the Download folder again.
When you are done with editing/watching/reading file, procedure for encryption is the same.
If you want to do it using terminal, you can do so.
To encrypt file in terminal enter following command:
infoATinformaticar.net – replace with your email address, you entered when creatign key
ImportantPic.jpg – replace with your filename you wish to encrypt
gpg -e -r info@informaticar.net ImportantPic.jpg
File is created

To decrypt file in terminal, enter encrypted filename you wish to decrypt
ImportantPic.jpg.gpg – replace with your filename you wish to decrypt
gpg ImportantPic.jpg.gpgYou will be asked for your encryption key password

Opening Encrypted file on another system (Windows, MacOS)
This procedure is valid if you are using GnuPG for your own file encryption on multiple systems.
On Windows I use gpg4win
On MacOS I use GPGTools
I will cover Windows here – go to gpg4win and download installation. After download is done, install it.
I will not cover installation in details. Only component you will definitely need is GnuPG, make sure it is checked on installation.Best to leave all as depicted below.

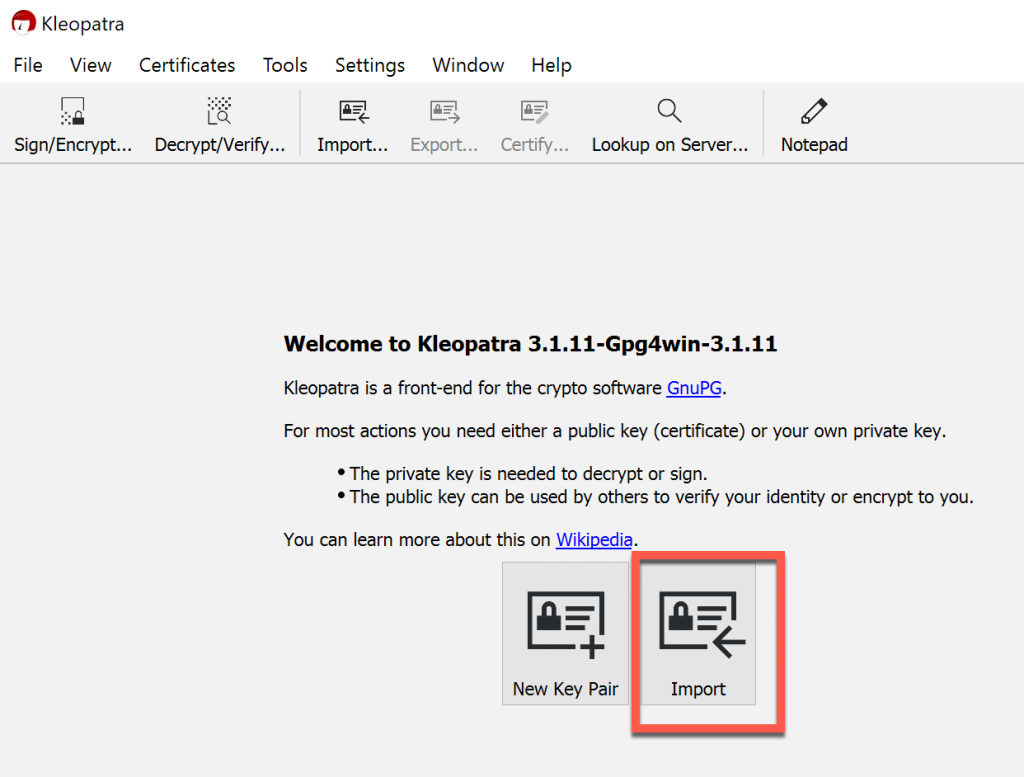
Start Kleopatra.
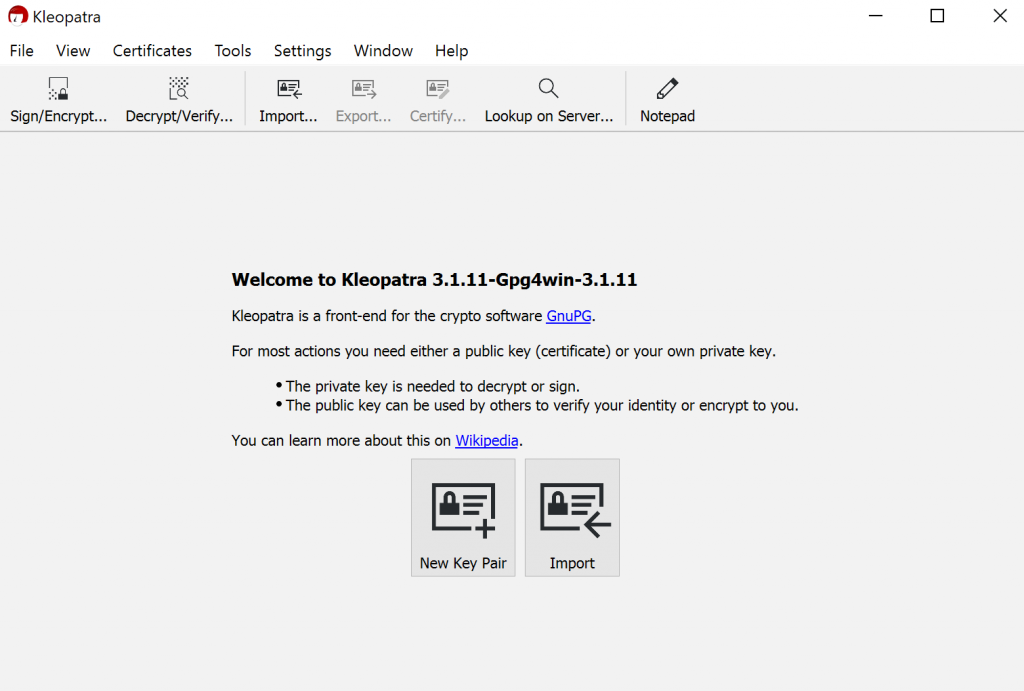
We don’t want to create new keys, want to use the key we created on our Ubuntu installation.
If we want to create new encrypted files and also read encrypted files we will need both public and private key from Ubuntu installation.
Private/Public key export
We will first just export public key from Ubuntu installation and import it on Windows so we can open our encrypted file.
First we will export public key on our Ubuntu install
gpg --output ~/informaticarpublic.key --armor --export info@informaticar.net–output is location where the public key will be saved. In my case that will be home directory and the key name will be informaticarpublic.key
–armor – will create ASCII armor output instead of binary
–export – will export public part of infoATinformaticar.net key we generated at start of this tutorial.

If I open created key, this is what will be in it.

We can also export our private key
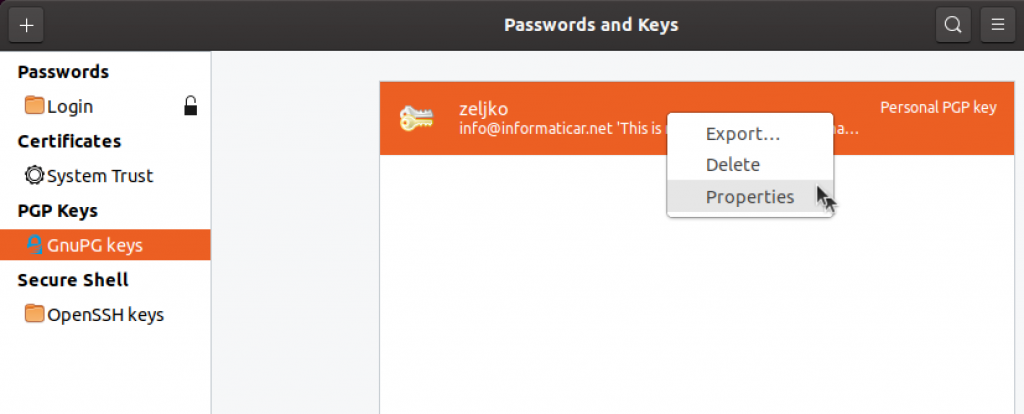
Open Passwords and Keys (Seahorse) on Ubuntu. Select PGP Keys – GnuPG keys – and click on private key we created. Select Properties.
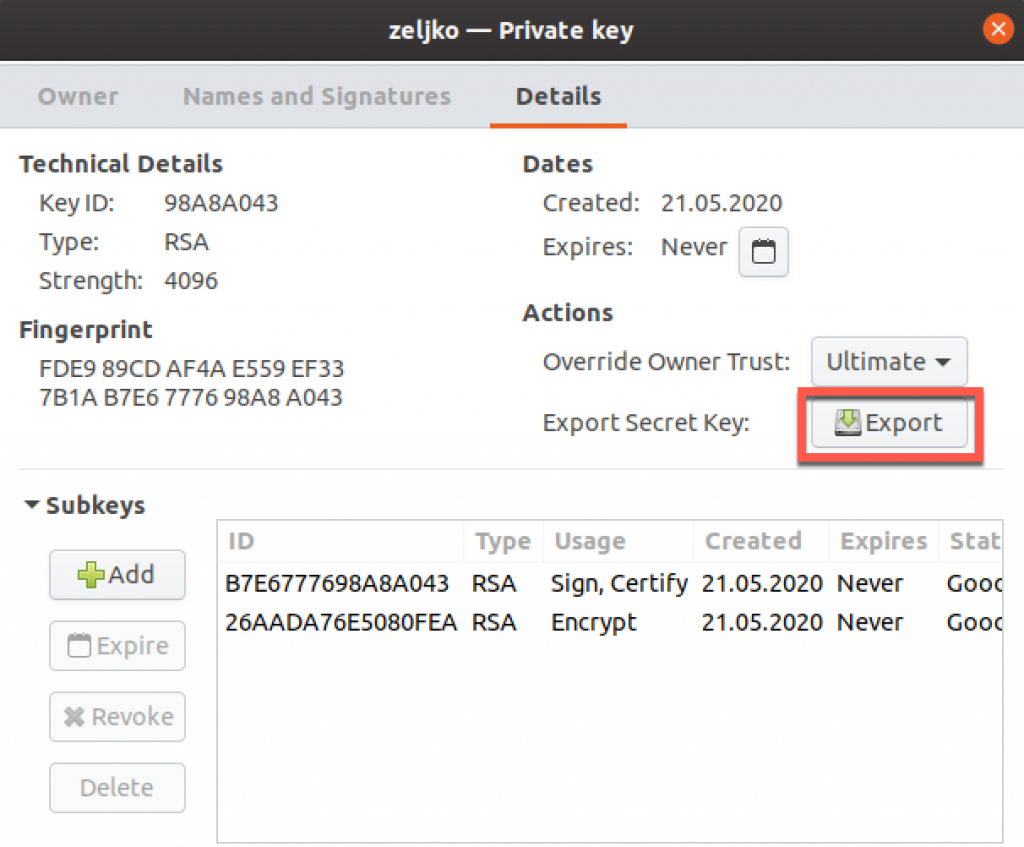
Select Details tab and under Actions click on Export next to “Export Secret Key”.
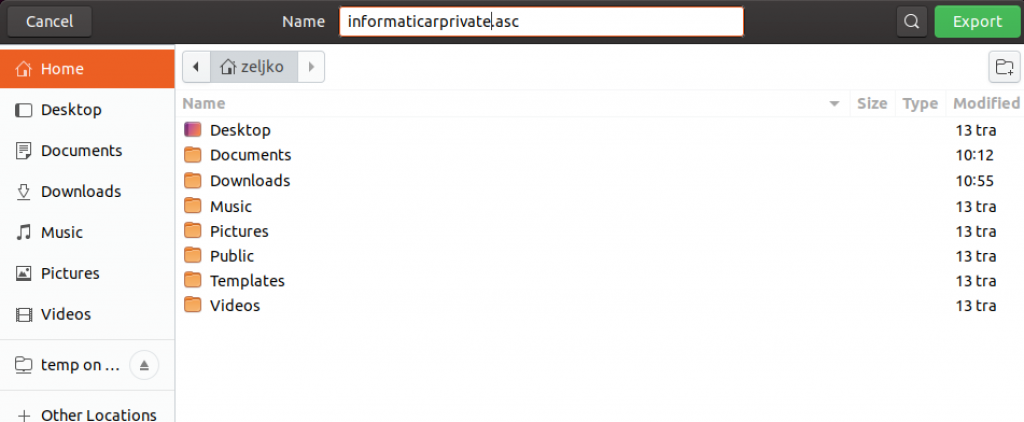
Enter name for the key (I entered informaticarprivate.asc) and select Export.You will need to confirm your passphrase before you can export the key.
Now, I will copy both private and public key to my Windows machine.
Open Kleopatra and select Import
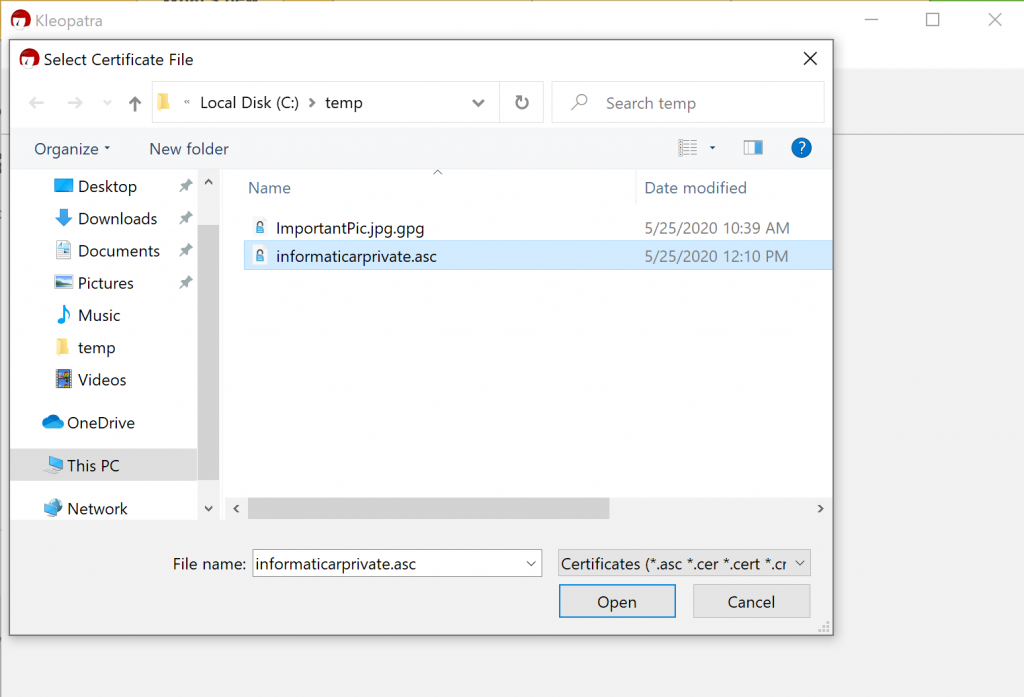
First we will import private key (informaticarprivate.asc).
We will confirm with yes. This is our own key.
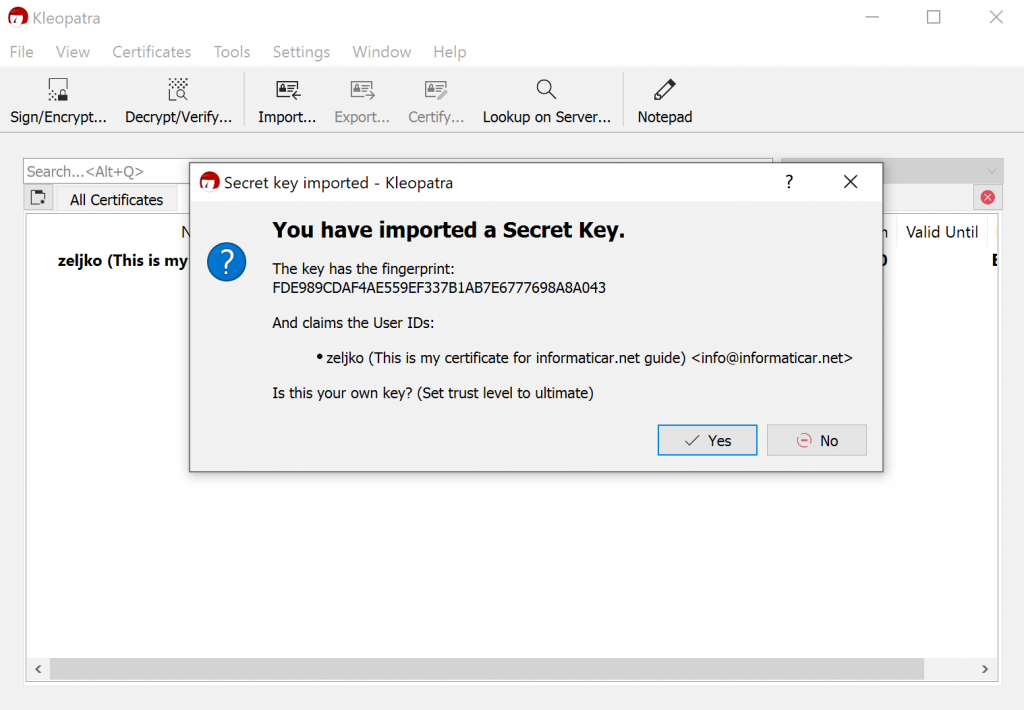
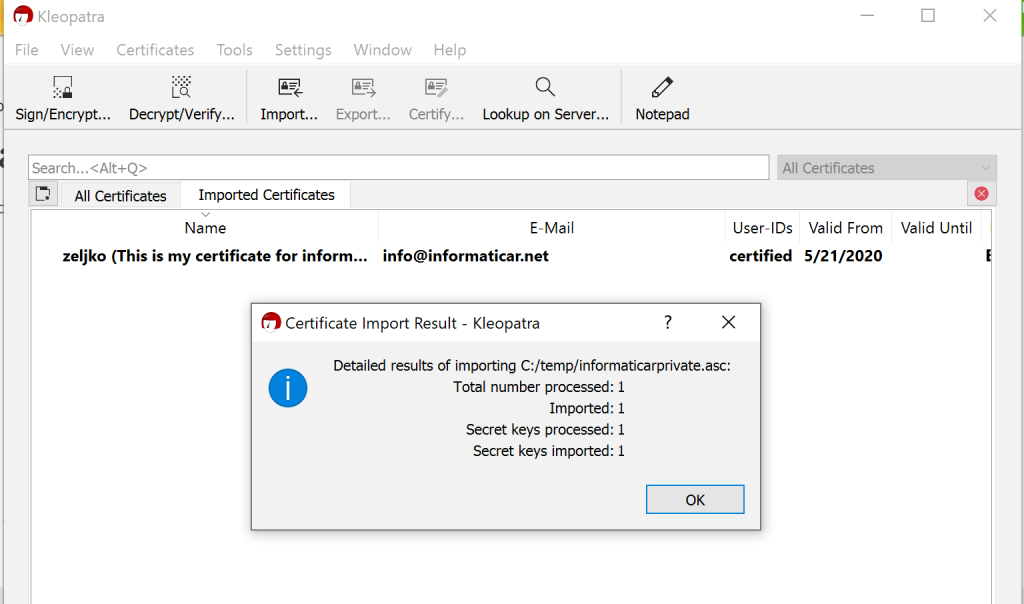
Ok, key is imported.
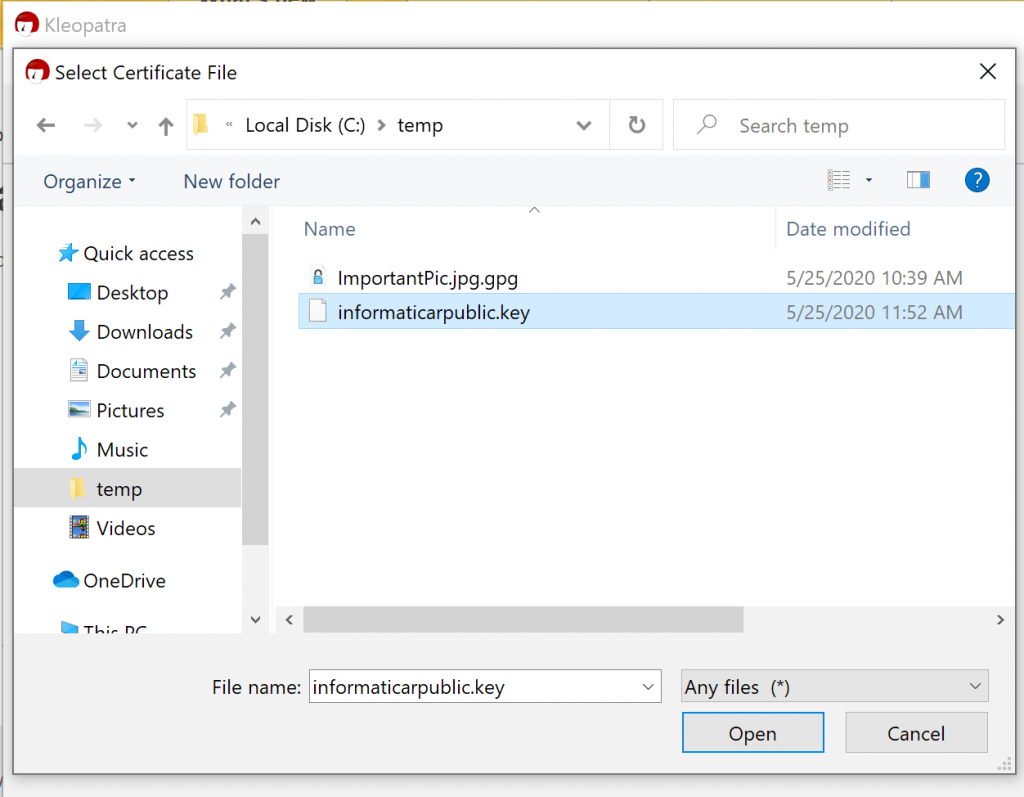
You can repeat this procedure for public part of the key. When selecting key, there is just one little difference. You will not see it by default in file explorer.
Select Any files (*) from the bottom of the screen and then select your public key you exported from Ubuntu. Select Open
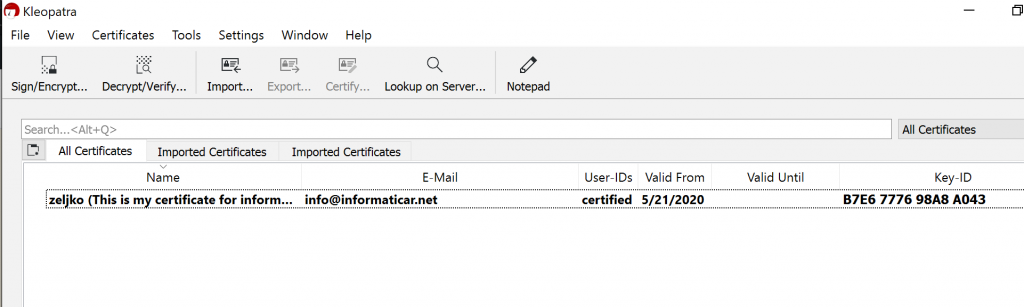
Ok, after we are done, this is how our Kleopatra should look like.
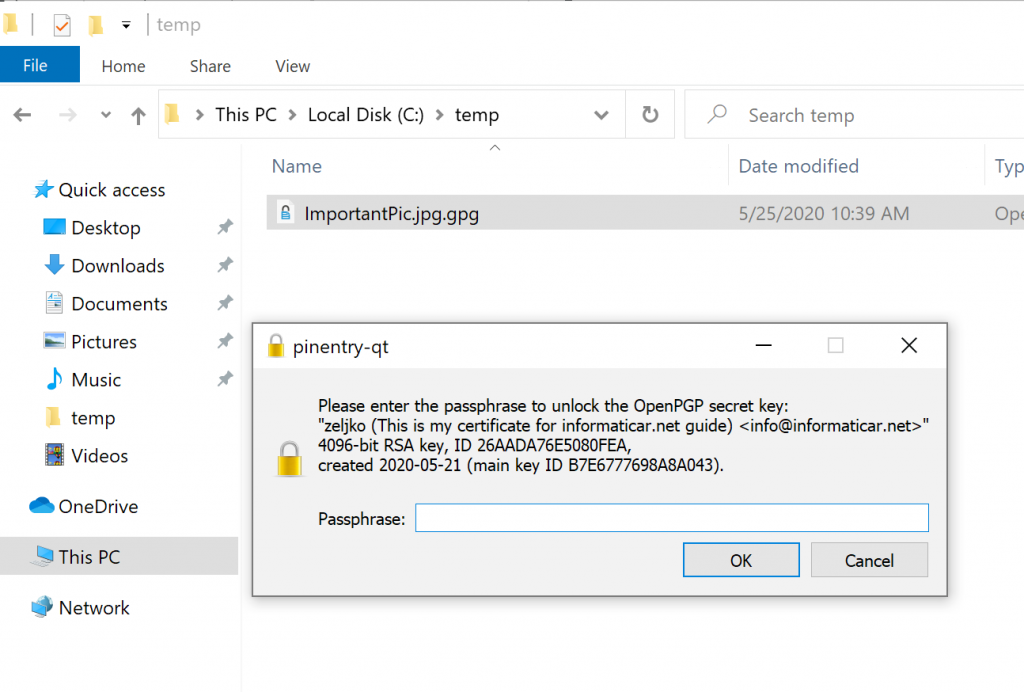
Lets now try and decrypt on Windows ImportantPic.jpg.gpg we created on Ubuntu and copied to Windows.
I will double click on file
If everything went ok, you will be asked for the passphrase for your file.
Kleopatra should also be activated in that moment, and dialog will say that “Decryption succeeded”
Confirm with “Save all”
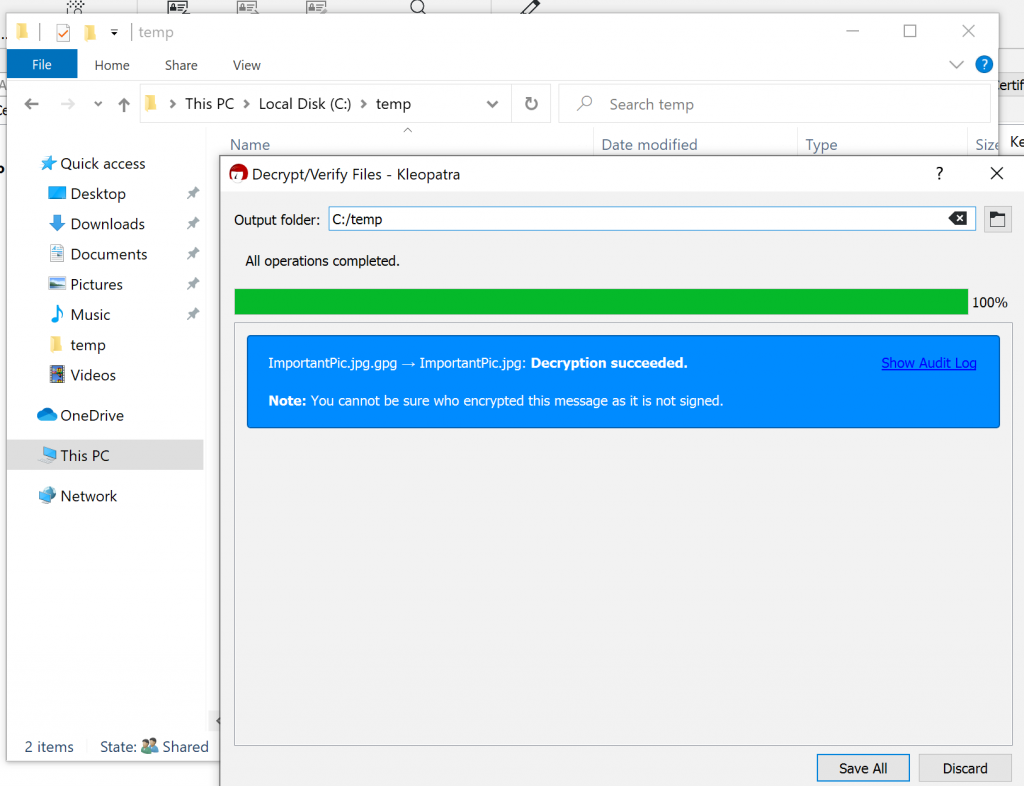
File is decrypted
____________________________
In case you would like to exchange files via email with third party, both sides need to have private/public key pairs created on their PCs, and would only need to exchange public keys for encryption (never send your private key to someone else!). When encrypting file you should select your private key and public key of the recipient. That is only difference for that scenario.
___________________________
So, that should be it. All that is left is to test Encryption/Decryption.
Encryption/Decryption test.
Ok, we already done testing from Ubuntu -> Windows. We will now test also vice versa.
I will encrypt file on Windows, and then decrypt in on Ubuntu. It should work since I have same key pair on both machines.
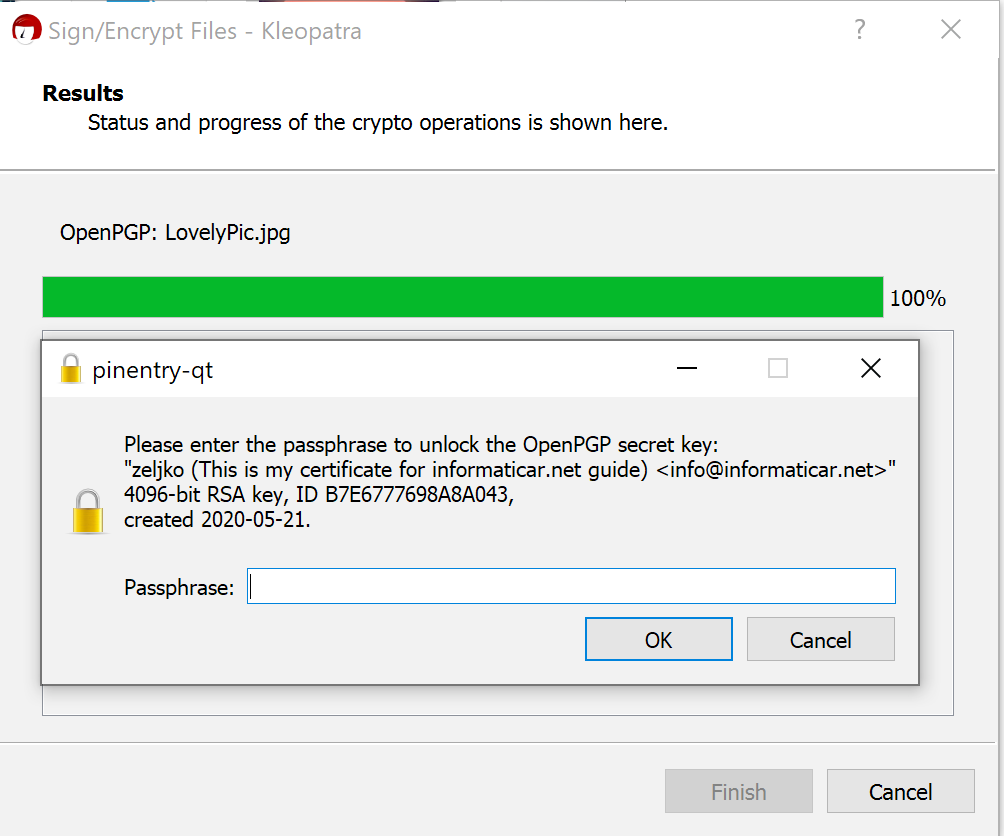
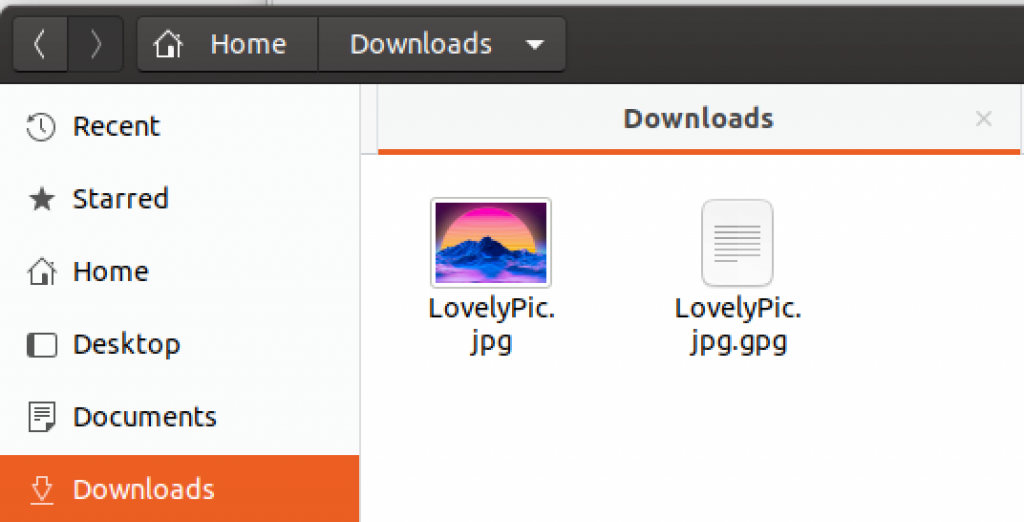
We will encrypt LovelyPic.jpg on Windows
Right click on file you wish to encrypt and select Sign and encrypt
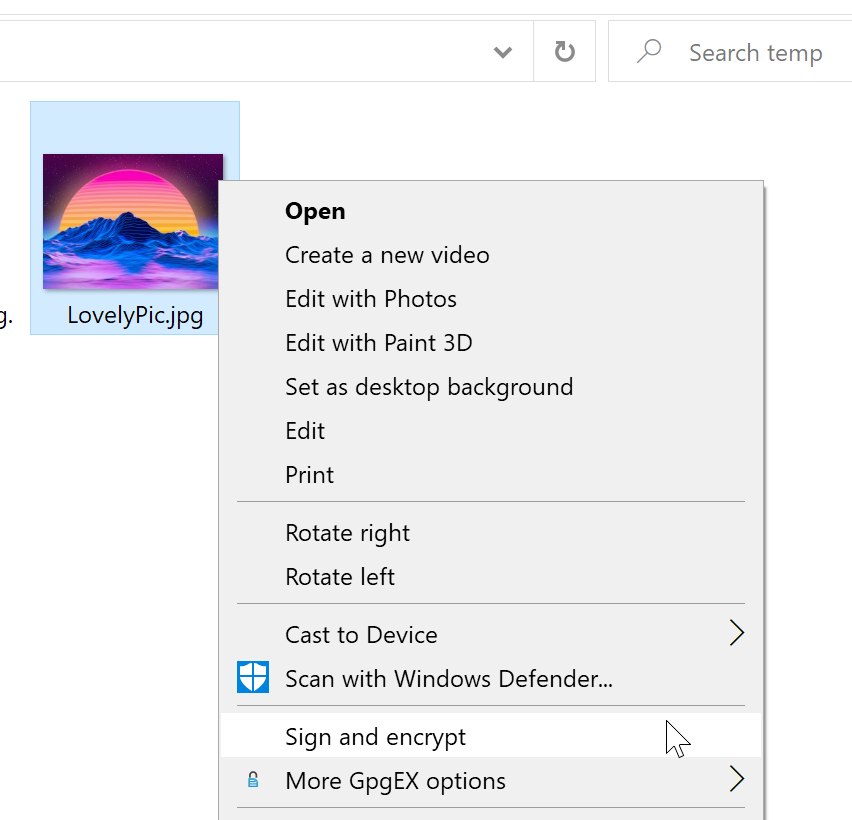
I will just sign it and encrypt it for me. Sign / Encrypt
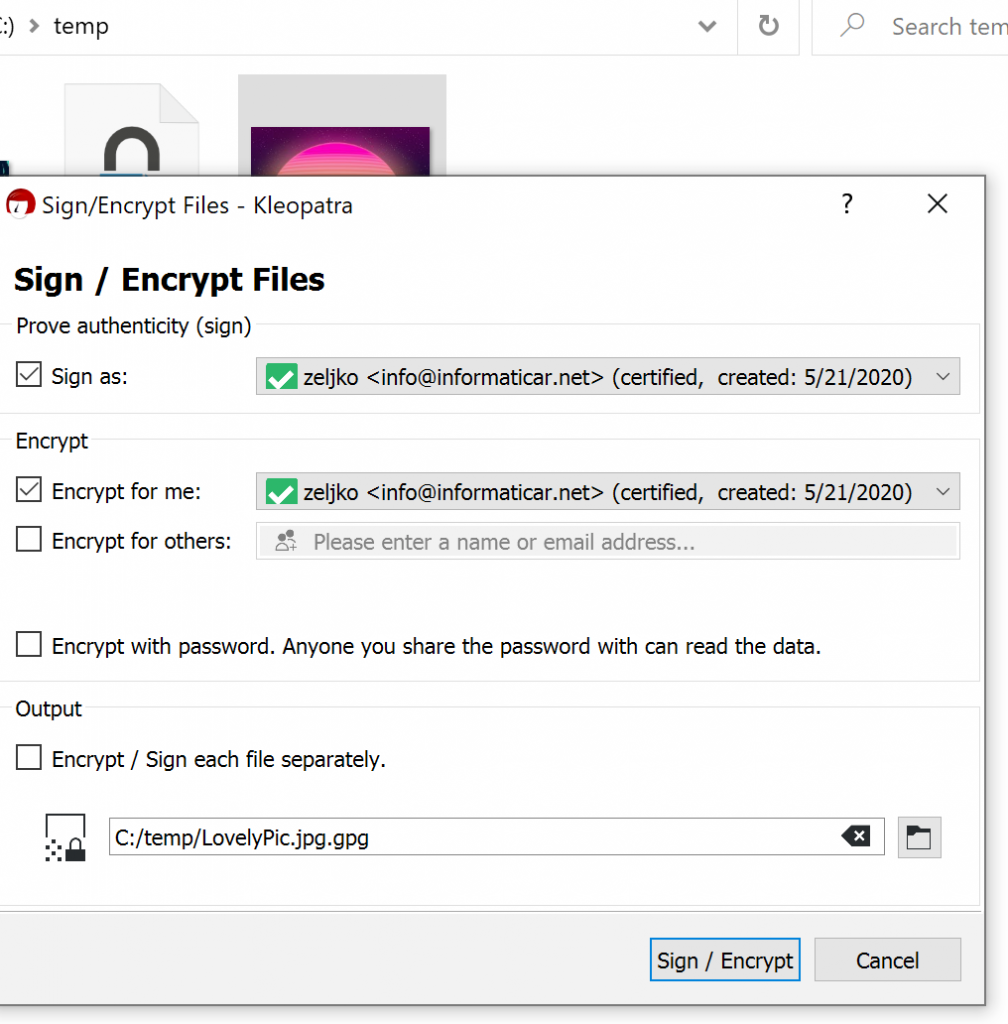
You will be asked for a key passphrase
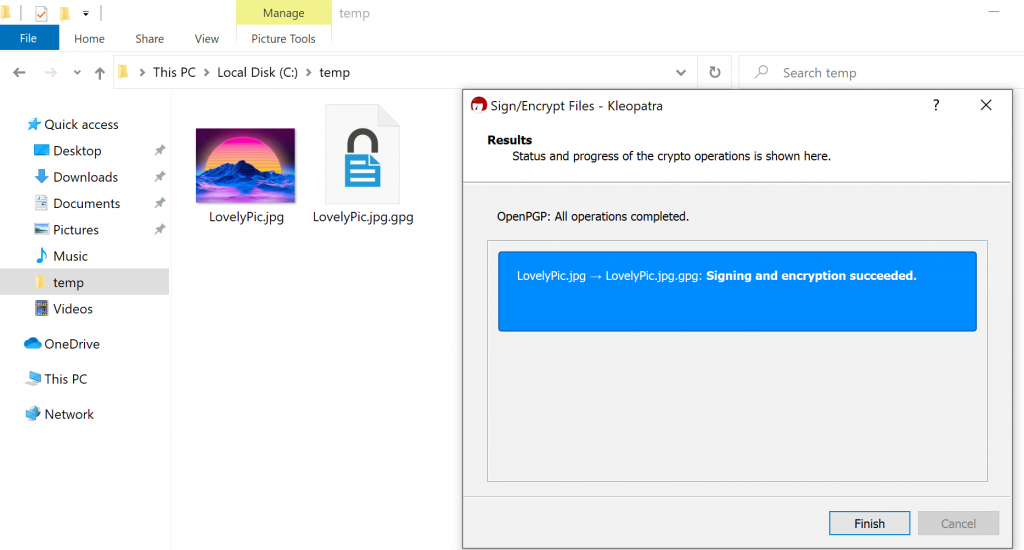
Encryption succeeded and we now have encrypted version of the picture. Select Finish in dialog that is opened.
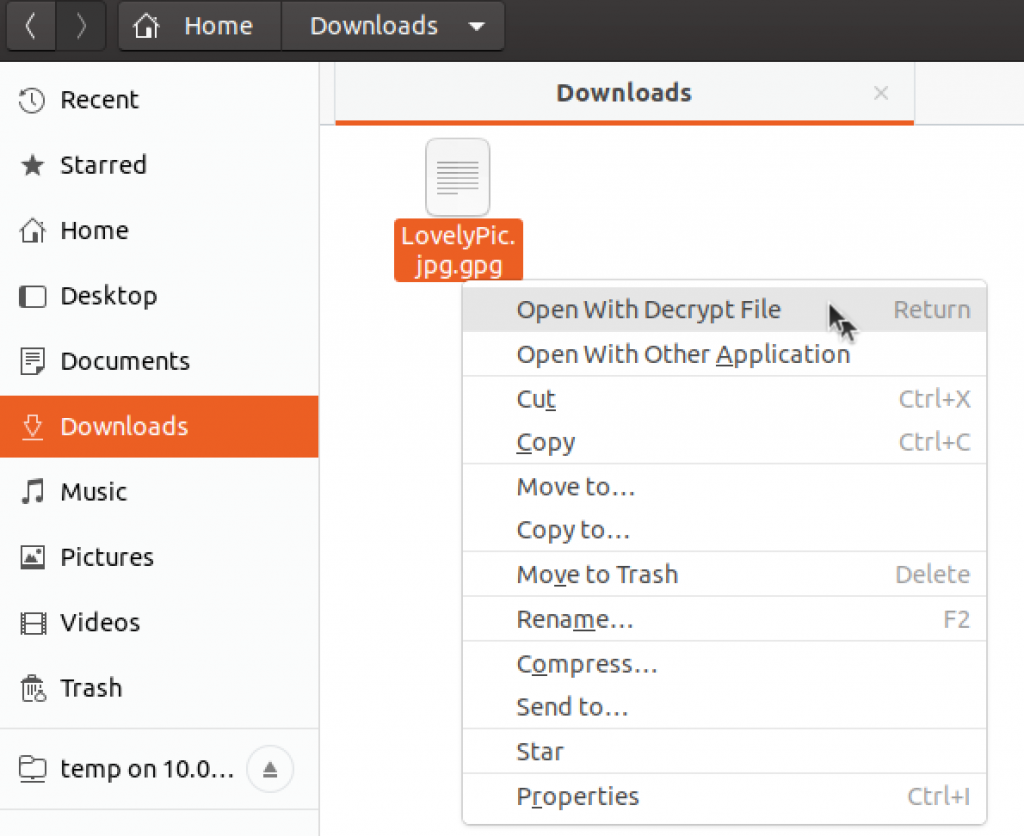
I copied file to Ubuntu to Download folder and will try and Decrypt it. Right click on the file – Open with Decrypt File
You will be asked for passphrase
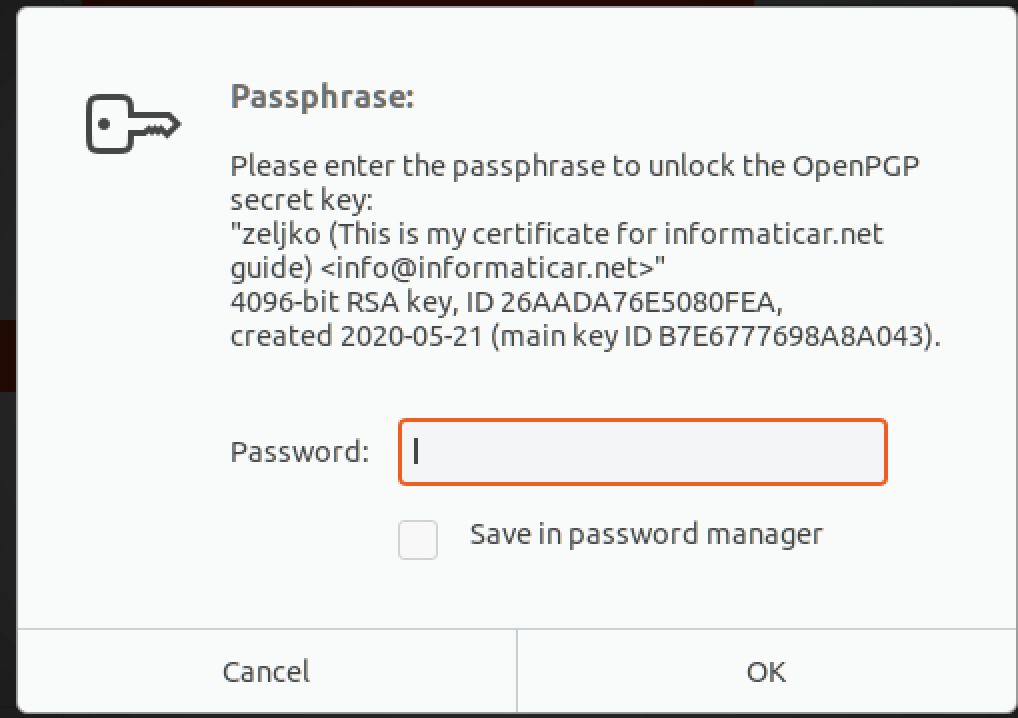
Success
Conclusion
What we done in this guide is a creation of key-pair that we can use for our private files security. With the same key we can encrypt/decrypt files on multiple systems. It is a little bit of manual work to encrypt/decrypt files but in the end this is free and secure solution well worth trying.
I would also like to encourage you to donate to the creators of these solutions, since a lot of work and effort is part of these wonderful and free solutions.